Desk Setup 2022
I wrote about my home office setup soon after COVID rendered many of us work from home hostages. It’s a popular post, and one that I’ve enjoyed sharing frequently to friends, coworkers, and Twitch denizens who are interested in enhancing their own home setups or curious about how I achieve high quality video and audio in remote meetings.
Since then, however, I’ve made a ton of further changes and enhancements to enhance my coding livestream and improve my ergonomics and health, so the original post is now barely accurate. I’m writing this refreshed post to detail my current setup.
Furniture
The only change in the furniture department since 2020 was the addition of a standing desk. Sitting in one place all day for a year plus definitely began to wear on me and I started to become jealous of my friends who had bought standing desks earlier in the pandemic and were of course reaping the benefits of a slightly healthier lifestyle. Standing at my desk now that I have the option definitely boosts my mood and activates a few muscles when I remember to use it.
Desk: UPLIFT Bamboo Standing Desk
I have an UPLIFT standing desk with a 30x60 inch bamboo desk top. The website has an amazingly good desk configurator with a ton of interesting options. I went with the black V2 C-Frame, grommet holes in the desk top, and the “advanced keypad” which gives you some desk height memory options.
I slightly regret getting the grommets, as they’re a bit unaesthetic and I didn’t end up using them significantly. I was expecting to mount my monitor arm on one of the grommets, but the distances didn’t quite work out, so now they’re mostly vestigial.
Overall, I’m very happy with this desk. Besides providing the benefit of less sitting throughout the day, it’s a major improvement over my previous desk because of its wide, stable and attractive desk surface.
Chair: Used Aeron
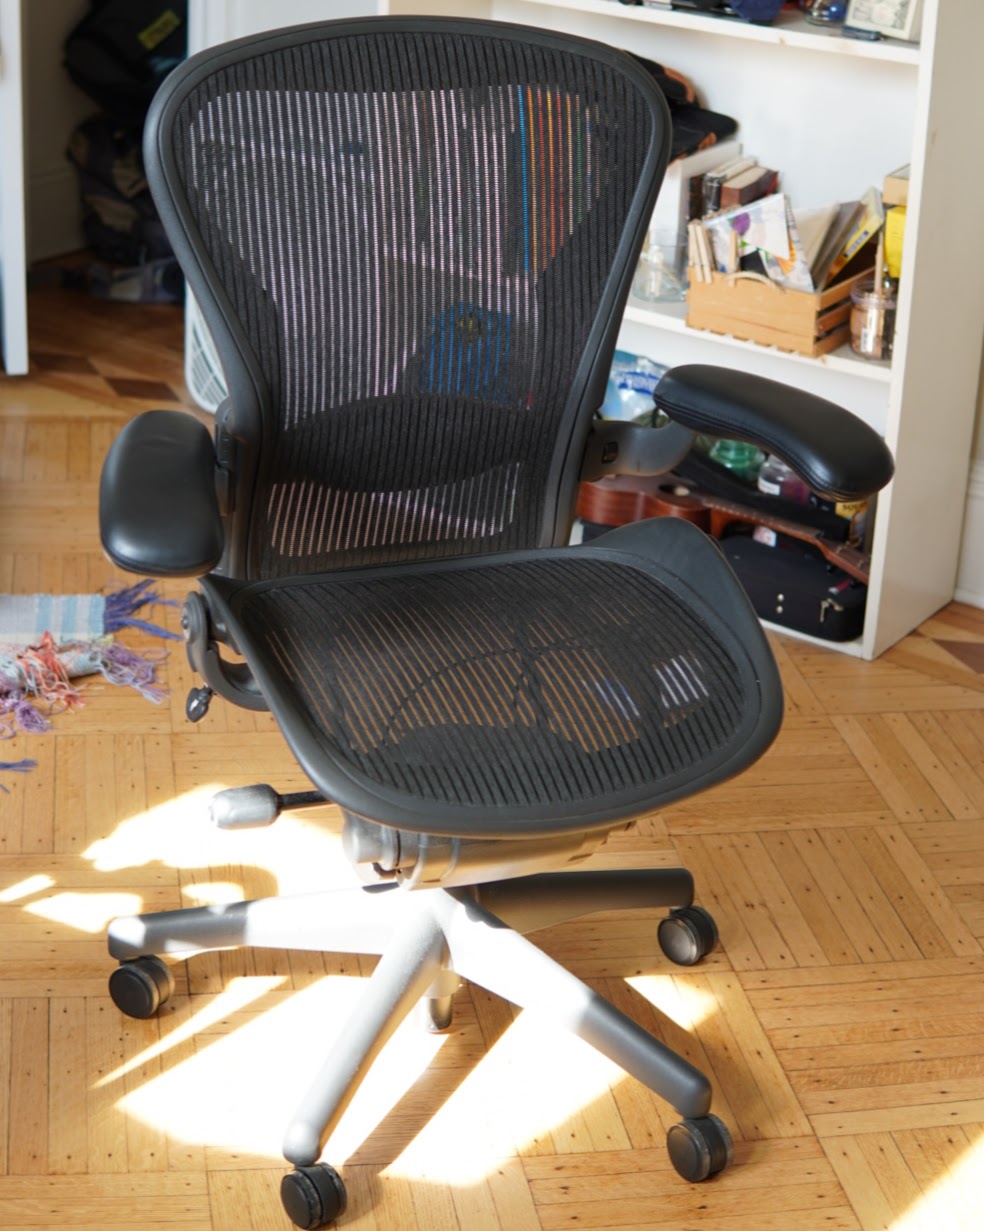
I have an Aeron chair that I bought on Craiglist in 2020. I still highly recommend getting an Aeron chair after sitting in it most days over the last year and a half. Its reputation is definitely deserved: it’s an adjustable, ergonomic and comfortable chair that I never really get tired of sitting in.
I replaced the disintegrating original casters with a set of rollerblade wheels for my chair as replacements.
This has had decidely mixed results. On the one hand, because the rollerblade casters are very low friction, the chair effortlessly glides around. Fun! On the other hand, this effortless gliding has made me realize that my room’s floor is far from true level. Gravity tends to pull me left, towards my door, making for an irritating ritual of needing to set the chair just right or risk rolling out of the frame during a meeting or stream. Annoying!
Another small annoyance that came up with the chair was a bit of distracting creaking when leaning the chair back. A Google+reddit search led me to an unsung hero who recommended purchasing an aerosol silicone spray and applying it to a certain joint of the chair. This worked really nicely. I recommend this product (and reddit instructions) if you also have a creaky Aeron chair.
Standing mat
I use the Standing Desk Mat with Heel Grab from UPLIFT that came with my desk. It’s really comfortable on my feet and slides nicely under the desk when I’m not using it. My feet stay comfortable standing on it for three or four hours at a time.
Acoustic panels
At work, I’m frequently in meetings that require me to talk. My fiancée also works from home full time, and we’re only separated by a single wooden door which is decidedly not soundproof. This has led to some occasional conflict about my voice volume while in meetings :)
It is very difficult to soundproof a room that doesn’t have a thick door. Rather than replace the door and try (likely in vain) to actually soundproof the room, I invested in some acoustic panels that are designed to attenuate echoes, with the theory that fewer echoes would be somewhat less noisy on the outside of the room.
I mounted 3 panels above my desk and 5 on the opposite wall behind me with double-sided exterior mounting tape. This noticeably reduced high-frequency echoes that you hear if you clap loudly, but I’m not sure if they significantly reduced noise volume in the end.
The panels are reasonably aesthetic: they provide a neutral, geometric accent but mostly blend in as they’re the same color as the wall.
Air purifier
At some point during the pandemic I began to feel like the air in my office felt somewhat stale and dusty, so rather than simply open the window and vacuum more frequently like a normal person, I invested in a Blue Pure air purifier to see if that would make a difference. I leave the purifier on most of the time. I don’t have an air quality measurement device that could help me understand if this actually did anything useful. Anecdotally, I don’t think I notice a difference in how the air “feels” after having begun to use the air purifier, so I can’t say this purchase was a particularly good one.
Computer equipment
The biggest change to my setup since 2020 is the addition of a desktop PC that I use as a personal computer and for my stream. I built the PC on stream, so you can watch the entire 5-hour process of a first timer building a computer if you have a taste for that sort of thing.

There are a few reasons that I made this change. First, I’ve always wanted to build a PC, and like many, the boredom and inward focus brought about by the first year of the pandemic provided an ample impetus to actually do it. Second, I hadn’t owned a reasonably powerful personal computer for several years, and was beginning to feel increasingly anxious about needing to use my company laptop for too many personal things.
Finally, the demands of livestreaming badly taxed even my top of the line company machine. I was also unable to stream at higher than 720p with reasonable performance, which always bothered me a bit even though 720p is probably more than enough for a livestream that’s mostly about programming.
PC specs
I purchased the parts for my computer during the great GPU shortage of 2021. I very nearly purchased a pre-built computer to get a better GPU and avoid the hassle of building my own, but in the end I really enjoyed the process of carefully selecting parts, the anticipation of waiting for them to arrive in the mail, and the thrill of putting the thing together and watching it successfully boot by the end. I wish I had a better GPU, but the level of gaming I do is low enough that it hasn’t mattered much: the worst thing that I’ve run into so far was low frame rates while trying to play Satisfactory and stream it via OBS at the same time.
The 5950x absolutely screams, by the way.
Here’s what the PC looked like before I put it together:
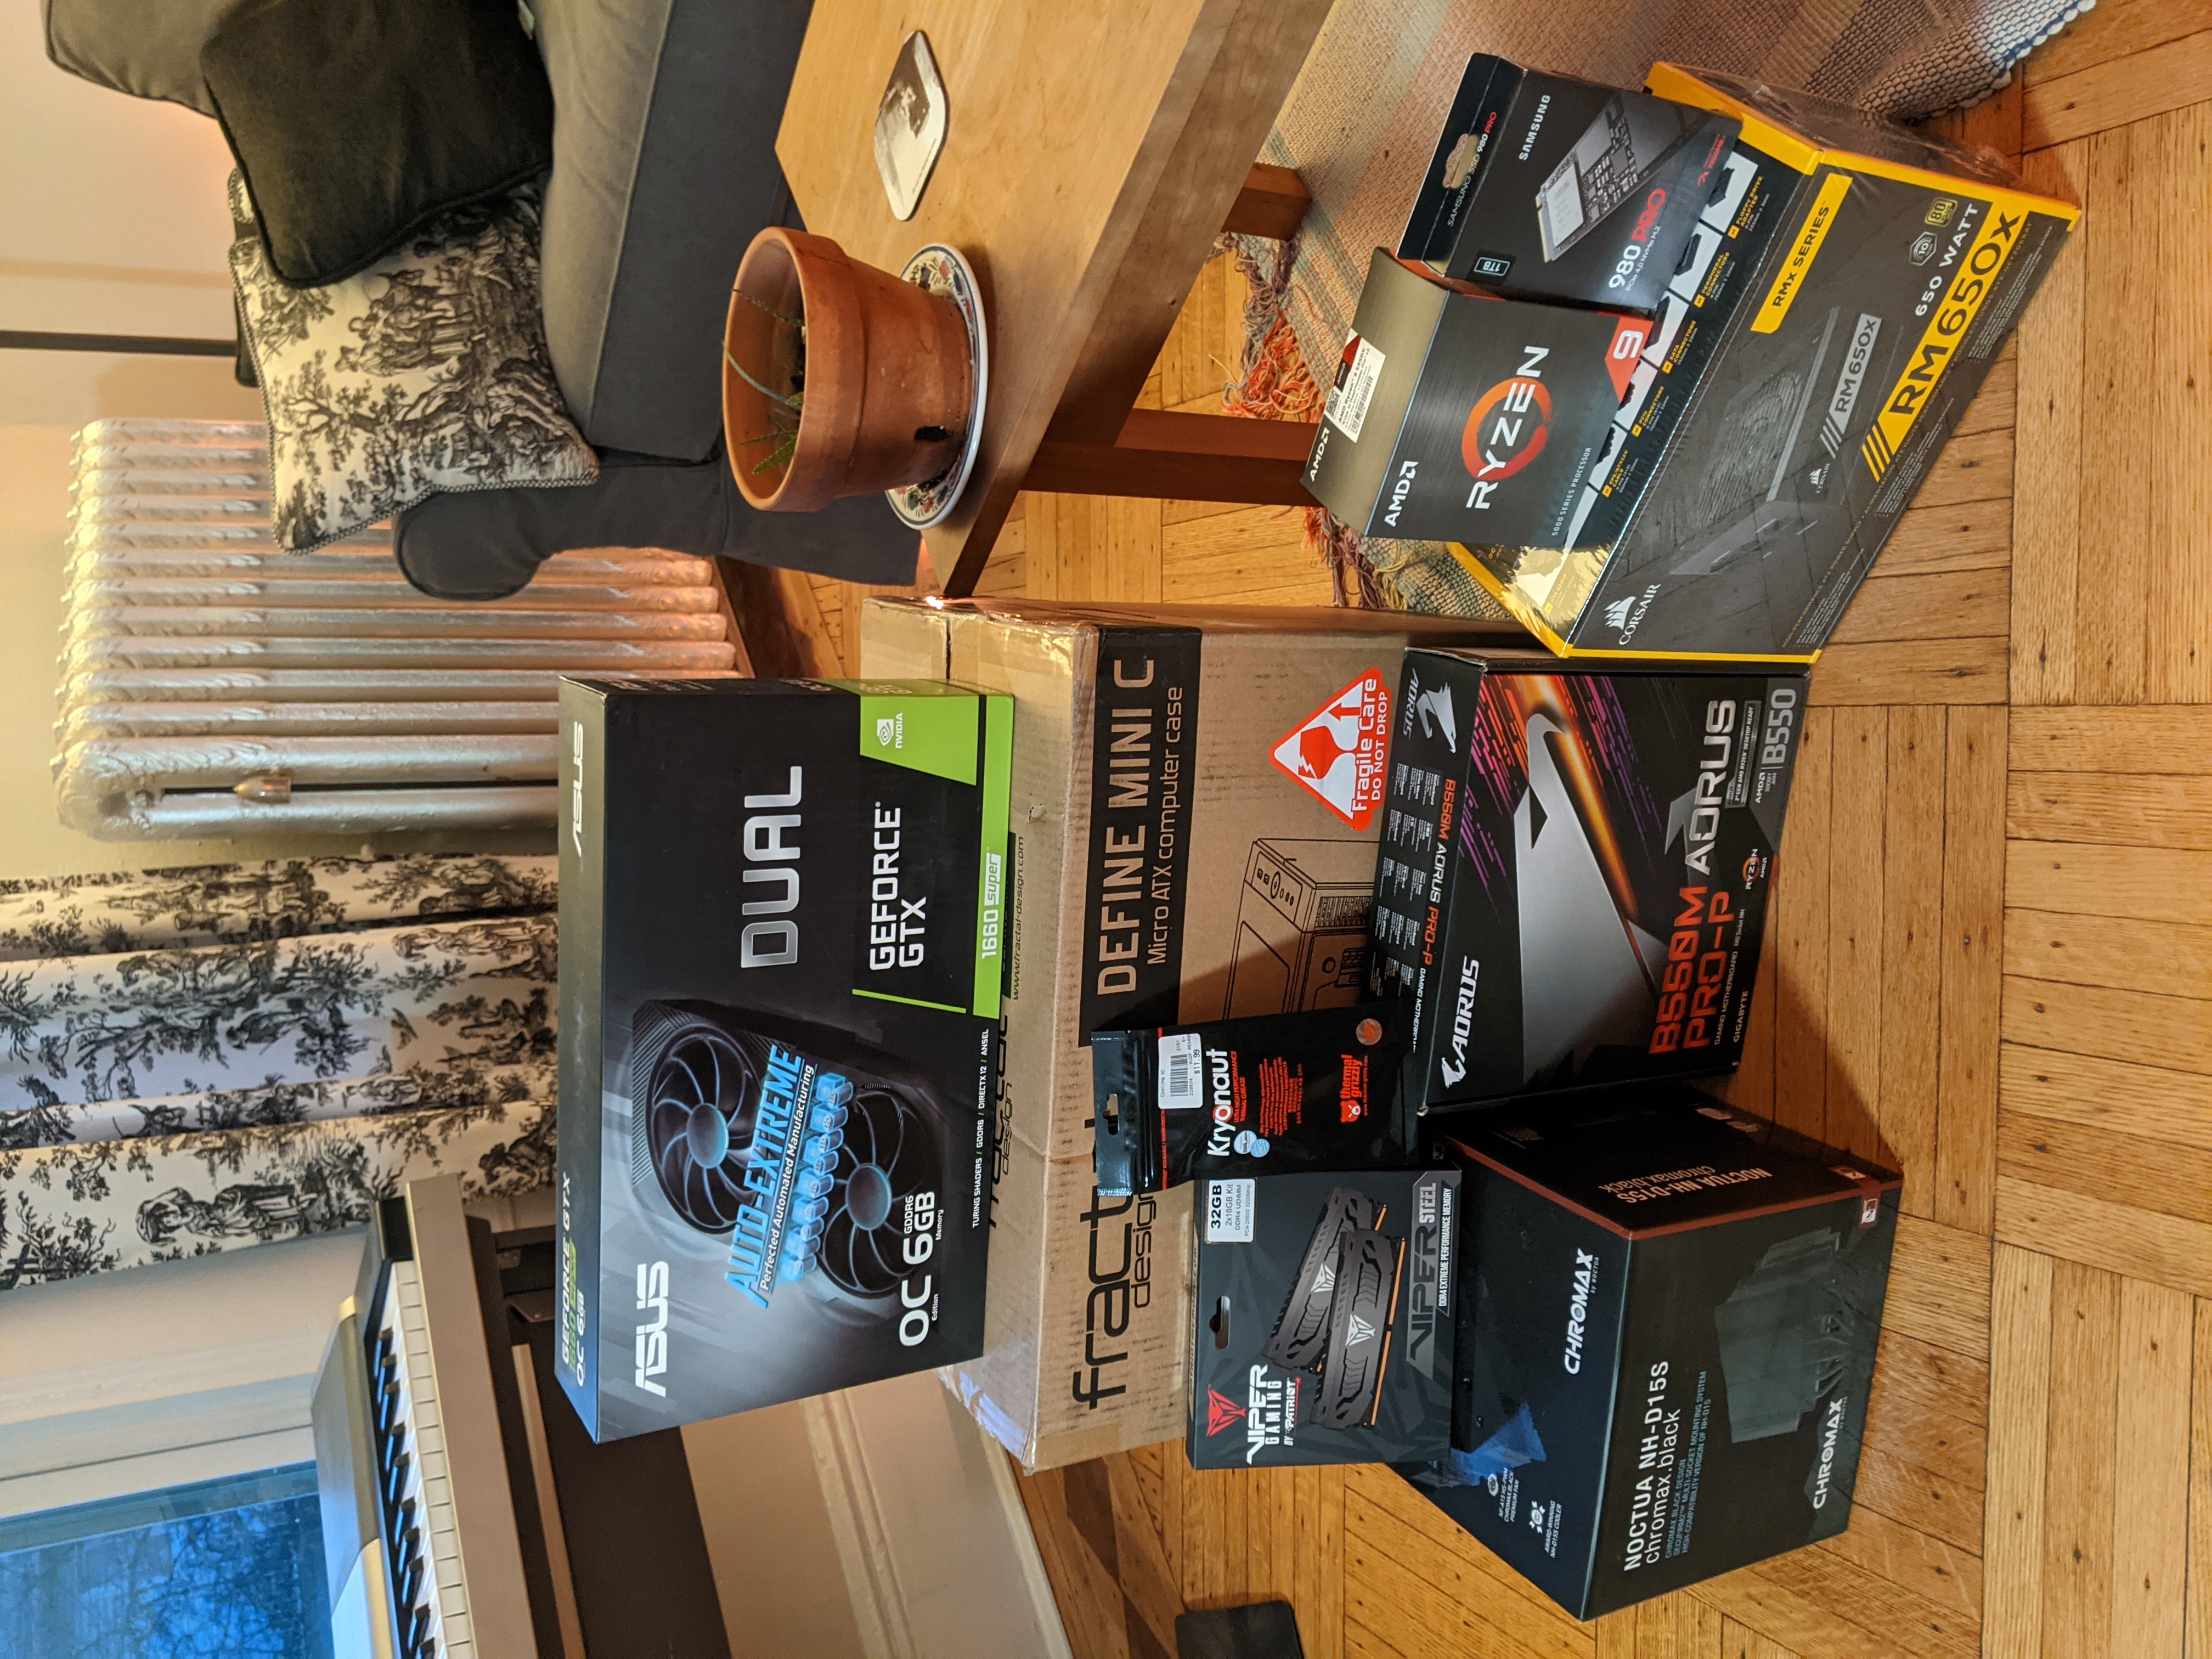
Full part list
- Case: Fractal Design Define Mini C TG MicroATX Mid Tower
- CPU: AMD Ryzen 5950x
- GPU: Asus GeForce GTX 1660 SUPER 6 GB DUAL EVO OC
- CPU Cooler: Noctua NH-D15S chromax.black
- Motherboard: Gigabyte B550M AORUS PRO-P Micro ATX AM4
- RAM: Patriot Viper Steel 32 GB (2 x 16 GB) DDR4-3200 CL16
- Storage: Samsung 980 Pro 1 TB M.2-2280 NVMe
- PSU: Corsair RMx (2018) 650 W ATX
- Case Fan (back): Noctua S12A PWM chromax.black.swap 63.27 CFM 120 mm
- Case Fans (front): 2x Noctua A14 PWM chromax.black.swap 82.52 CFM 140 mm
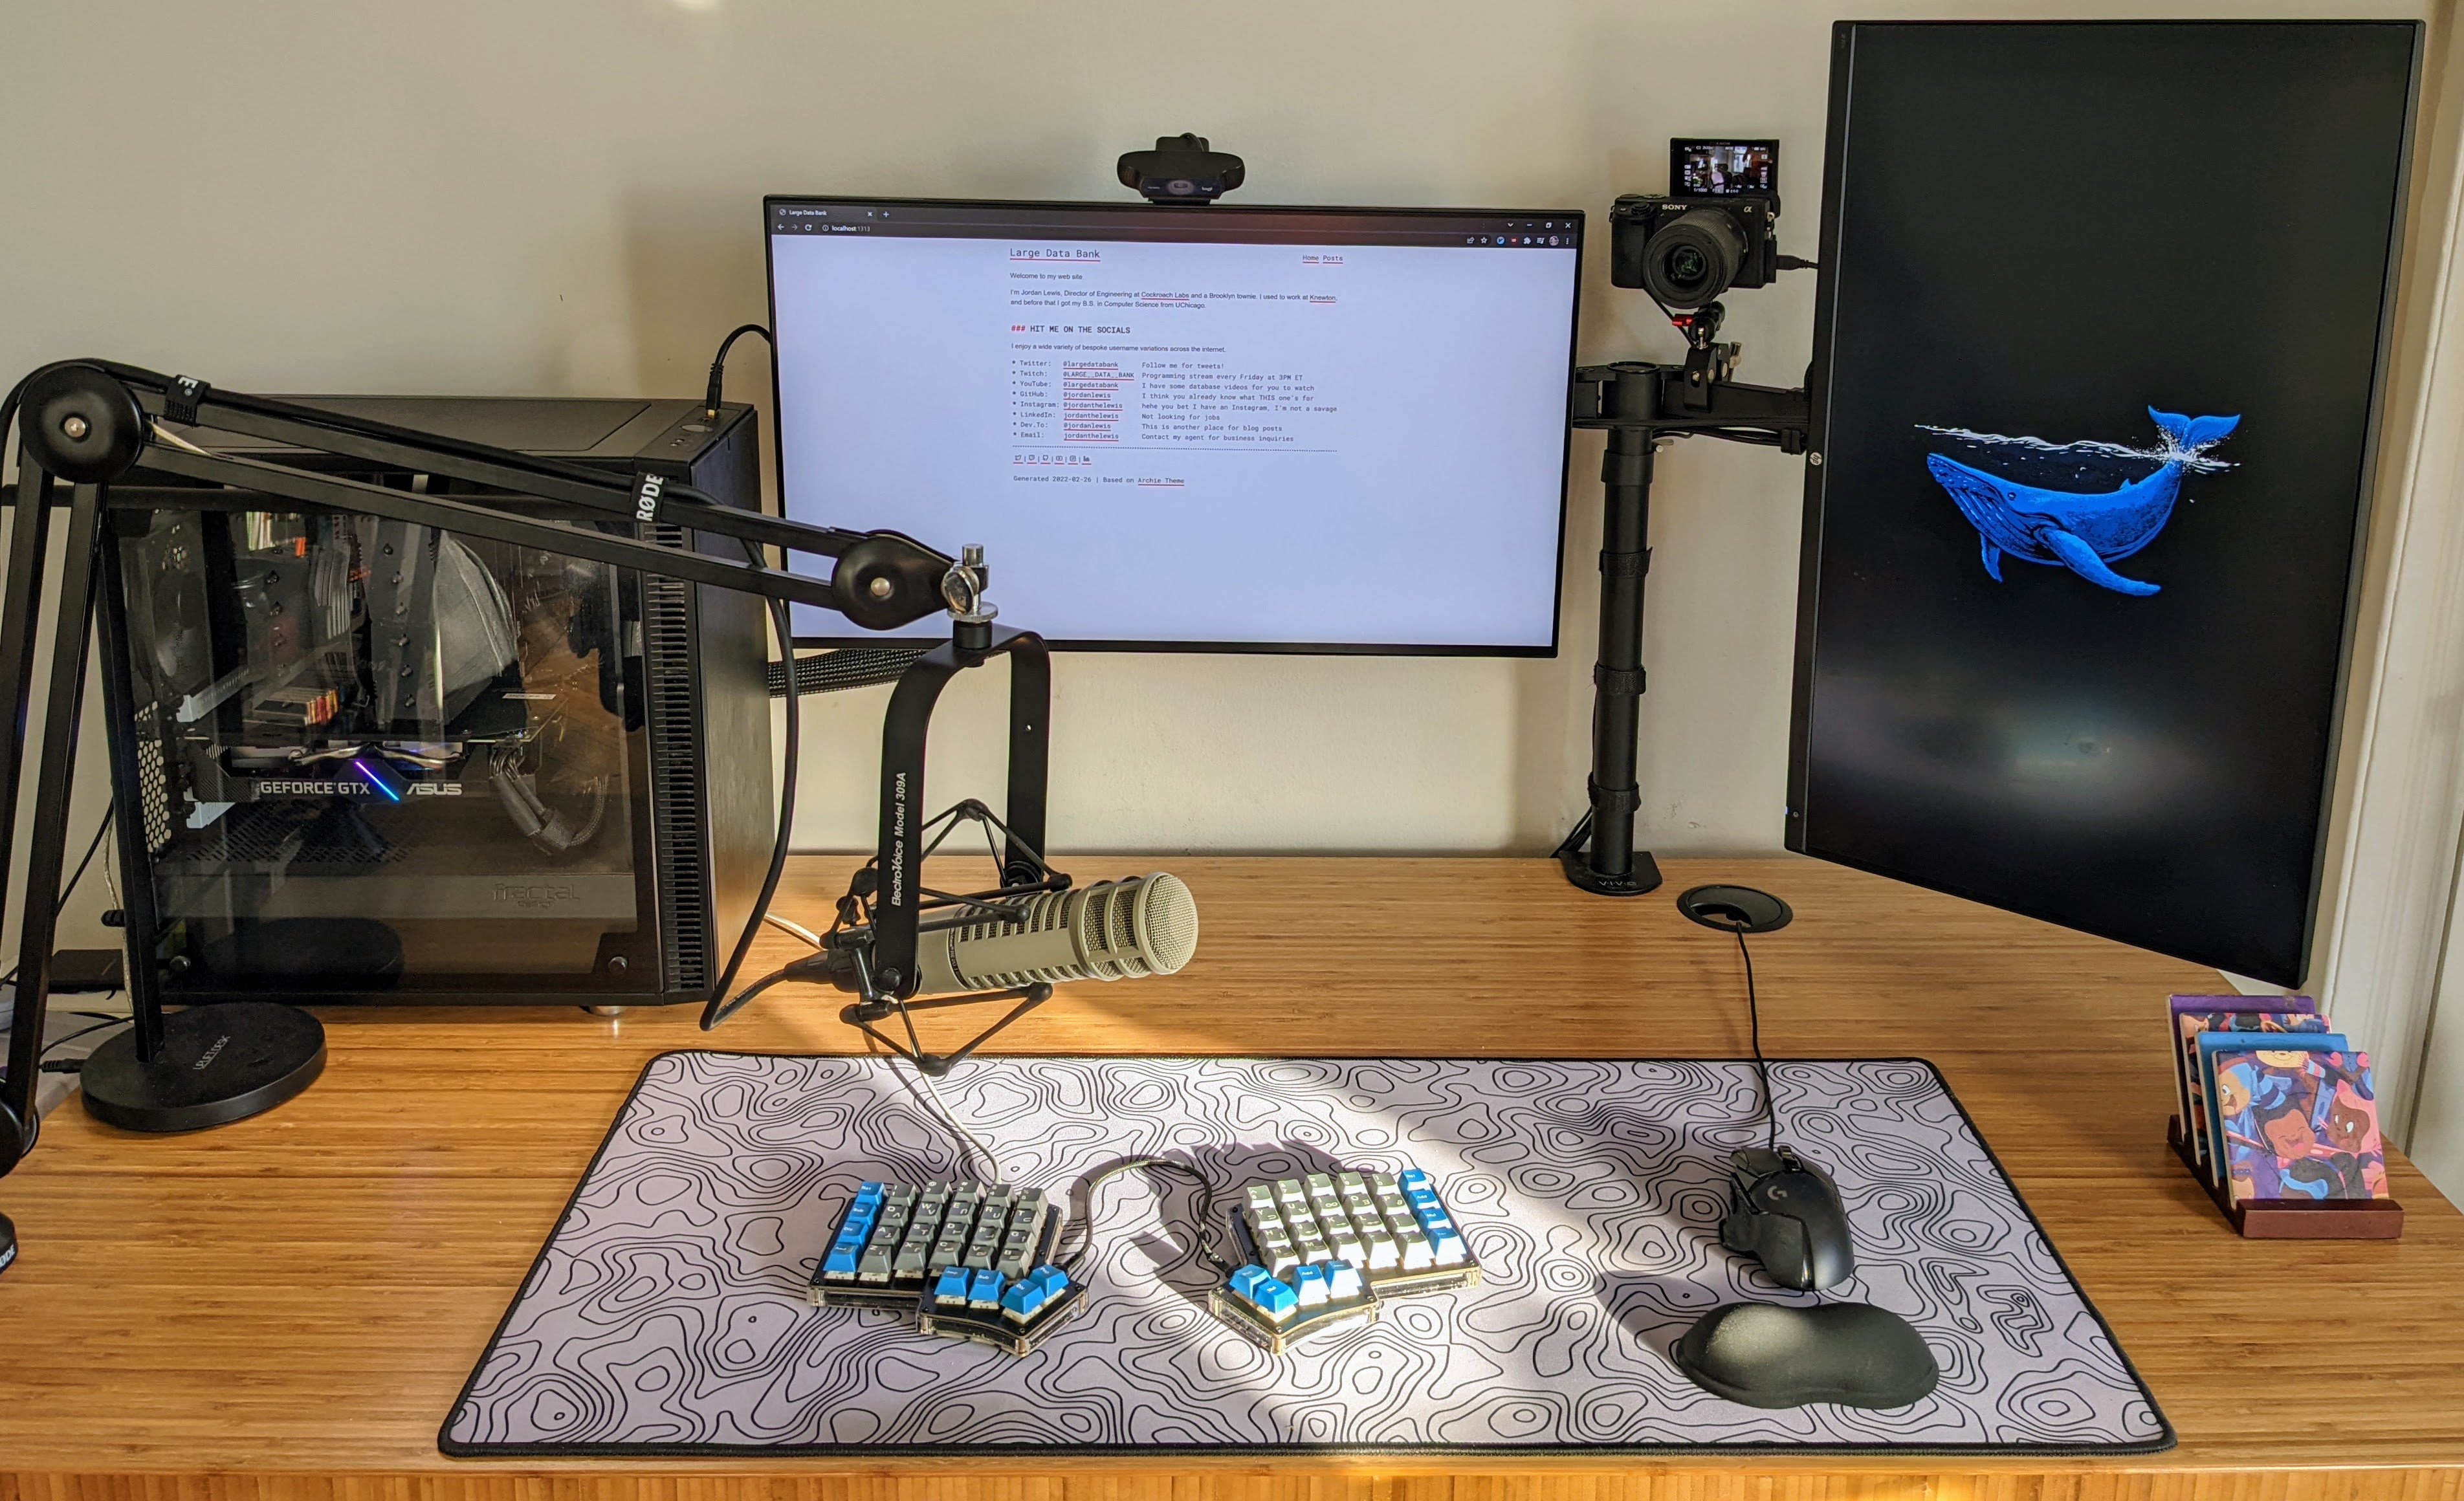
Monitors and monitor stand
My 2020 setup consisted of a single external monitor that vertically extended my laptop screen. Of course, a desktop machine doesn’t have a built-in screen, so to preserve the all-important two-screen setup I needed to purchase a second monitor.
I ended up going with the LG 27GN950-B, a highly-rated 4k monitor with a low latency and high refresh rate.
Using a VIVO Dual Monitor Desk Mount Stand, I have the LG mounted horizontally directly ahead of my chair, and my trusty 1440p HP Z-27n mounted vertically to the right.
This desk stand isn’t as adjustible as the Jarvis arm that I used to have, but it’s sturdier, and I haven’t missed the absurdly flexible Jarvis one bit.
Overall, I really like this setup: the horizontally mounted, high-resolution LG is where my IDE, terminals, and web browsers live, and the monitor that I capture for my stream. And the vertically mounted Z27N is where my email client, calendar, Twitter, Slack and Discord live.
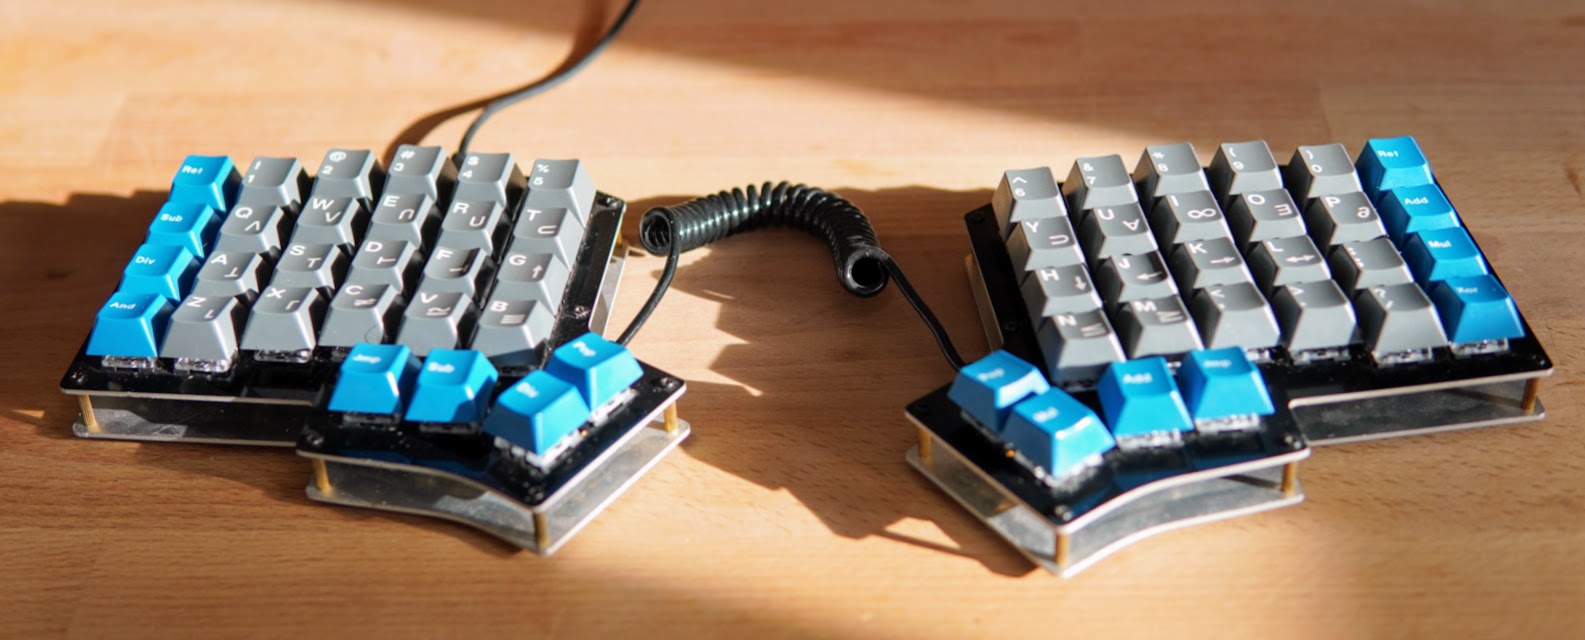
Keyboard: Iris Rev5
I can’t use a standard, un-split keyboard without getting wrist pain, so I’ve needed to use some variety of ergonomic keyboard since my first job. I started with the Microsoft Natural Ergonomic 4000, which is an incredibly affordable and effective solution for wrist pain that I recommend to everyone who is beginning to have symptoms.
I eventually got bitten with the mechanical keyboard bug, which is a great way to waste a lot of money. My current daily driver is an pre-built Iris Rev 5 from keeb.io. It has Boba U4 62g keyswitches, which are wonderfully quiet and don’t bother my fiancée like the much louder Kailh Sage 75g clicky keyswitches that I had before. The keycaps are Space Cadet GMK, which I also bought from someone on Reddit. I really like the color scheme and Lisp machine stylings of these keycaps.
The Iris’s layout is far and away my favorite layout that I’ve tried so far. Its split nature means that I can adjust the angles of the keyboard to perfectly match the angles of my arms, so that no matter where my hands are on the desk, I never have to deviate my wrists away from alignment with my arms. I also like how compact the keyboard is, because it means that I can place my mouse pretty close to where my right hand sits on the home row. The only thing I’d like to try tweaking here is adding some tenting, so that my hands can sit at a more natural level of pronation.
I use a customized variant of a QWERTY keyboard layout. You can see the layout
on
GitHub
if you’re curious. The Iris demands that you spend a little bit of time
thinking about where some keys go, because it is missing one of the standard
columns on the right side of the keyboard. Most of the changes just have to do
with placing keys like [ and ] in logical spots, which I won’t bore you
with.
Navigation layer
The Iris’s firmware, QMK, allows you to make custom layers, which are keyboard mappings accessible after holding (or toggling) a keyswitch. Normally, we’re all used to the Shift layer (capitalizes letters when Shift is held) and others (option, command, etc), but QMK gives you the flexibility of defining your own.
I’ve defined a navigation layer that gives me the arrow keys on IJKL, so I can hold a thumb modifier on my left hand and arrow-key navigate with my right hand without having to leave the home row. This is pretty nice. The navigation layer is also used to access F keys in my layout.
My favorite customization is probably mapping the Caps Lock key to control when held and escape when tapped. Thanks to Steve Losh and his classic 2012 blog post A Modern Space Cadet for teaching me this trick.
Mouse: Logitech G502 Hero

My trusty Logitech G500 began to fail to register right clicks in October, so I ended up upgrading to a Logitech G502 Hero, a slightly fancier but not significantly more expensive wired Logitech mouse.
It’s got the same lovely scroll wheel clutch that I loved about the G500, a few more buttons and good build quality, but with a slightly uglier “gamer” design and RGB lights that have to be disabled in software. I’m happy with the mouse, but I do wish that Logitech would offer a high-end wired mouse without RGB and a “gamer” appearance.
Desk Mat and Wrist Rest
I bought a desk pad from NovelKeys. I like having a huge mouse pad and uniform surface underneath my keyboard and mouse. But I think appearance-wise it looks only alright, and I hope to replace it at somet point with something a little more appealing.
Being untethered from a mouse pad is nice, but I missed a wrist rest for my mouse hand. So, I bought a standalone gel wrist rest that is nicely sized and does the trick.
A/V equipment
I started my live coding stream a little bit before COVID started, so I was lucky enough to grab the following equipment without difficulty. I’ve heard a lot of this stuff is sold out now due to supply chain issues, so YMMV if you’re looking to purchase it as of this writing.
Microphone: Electro-Voice RE20
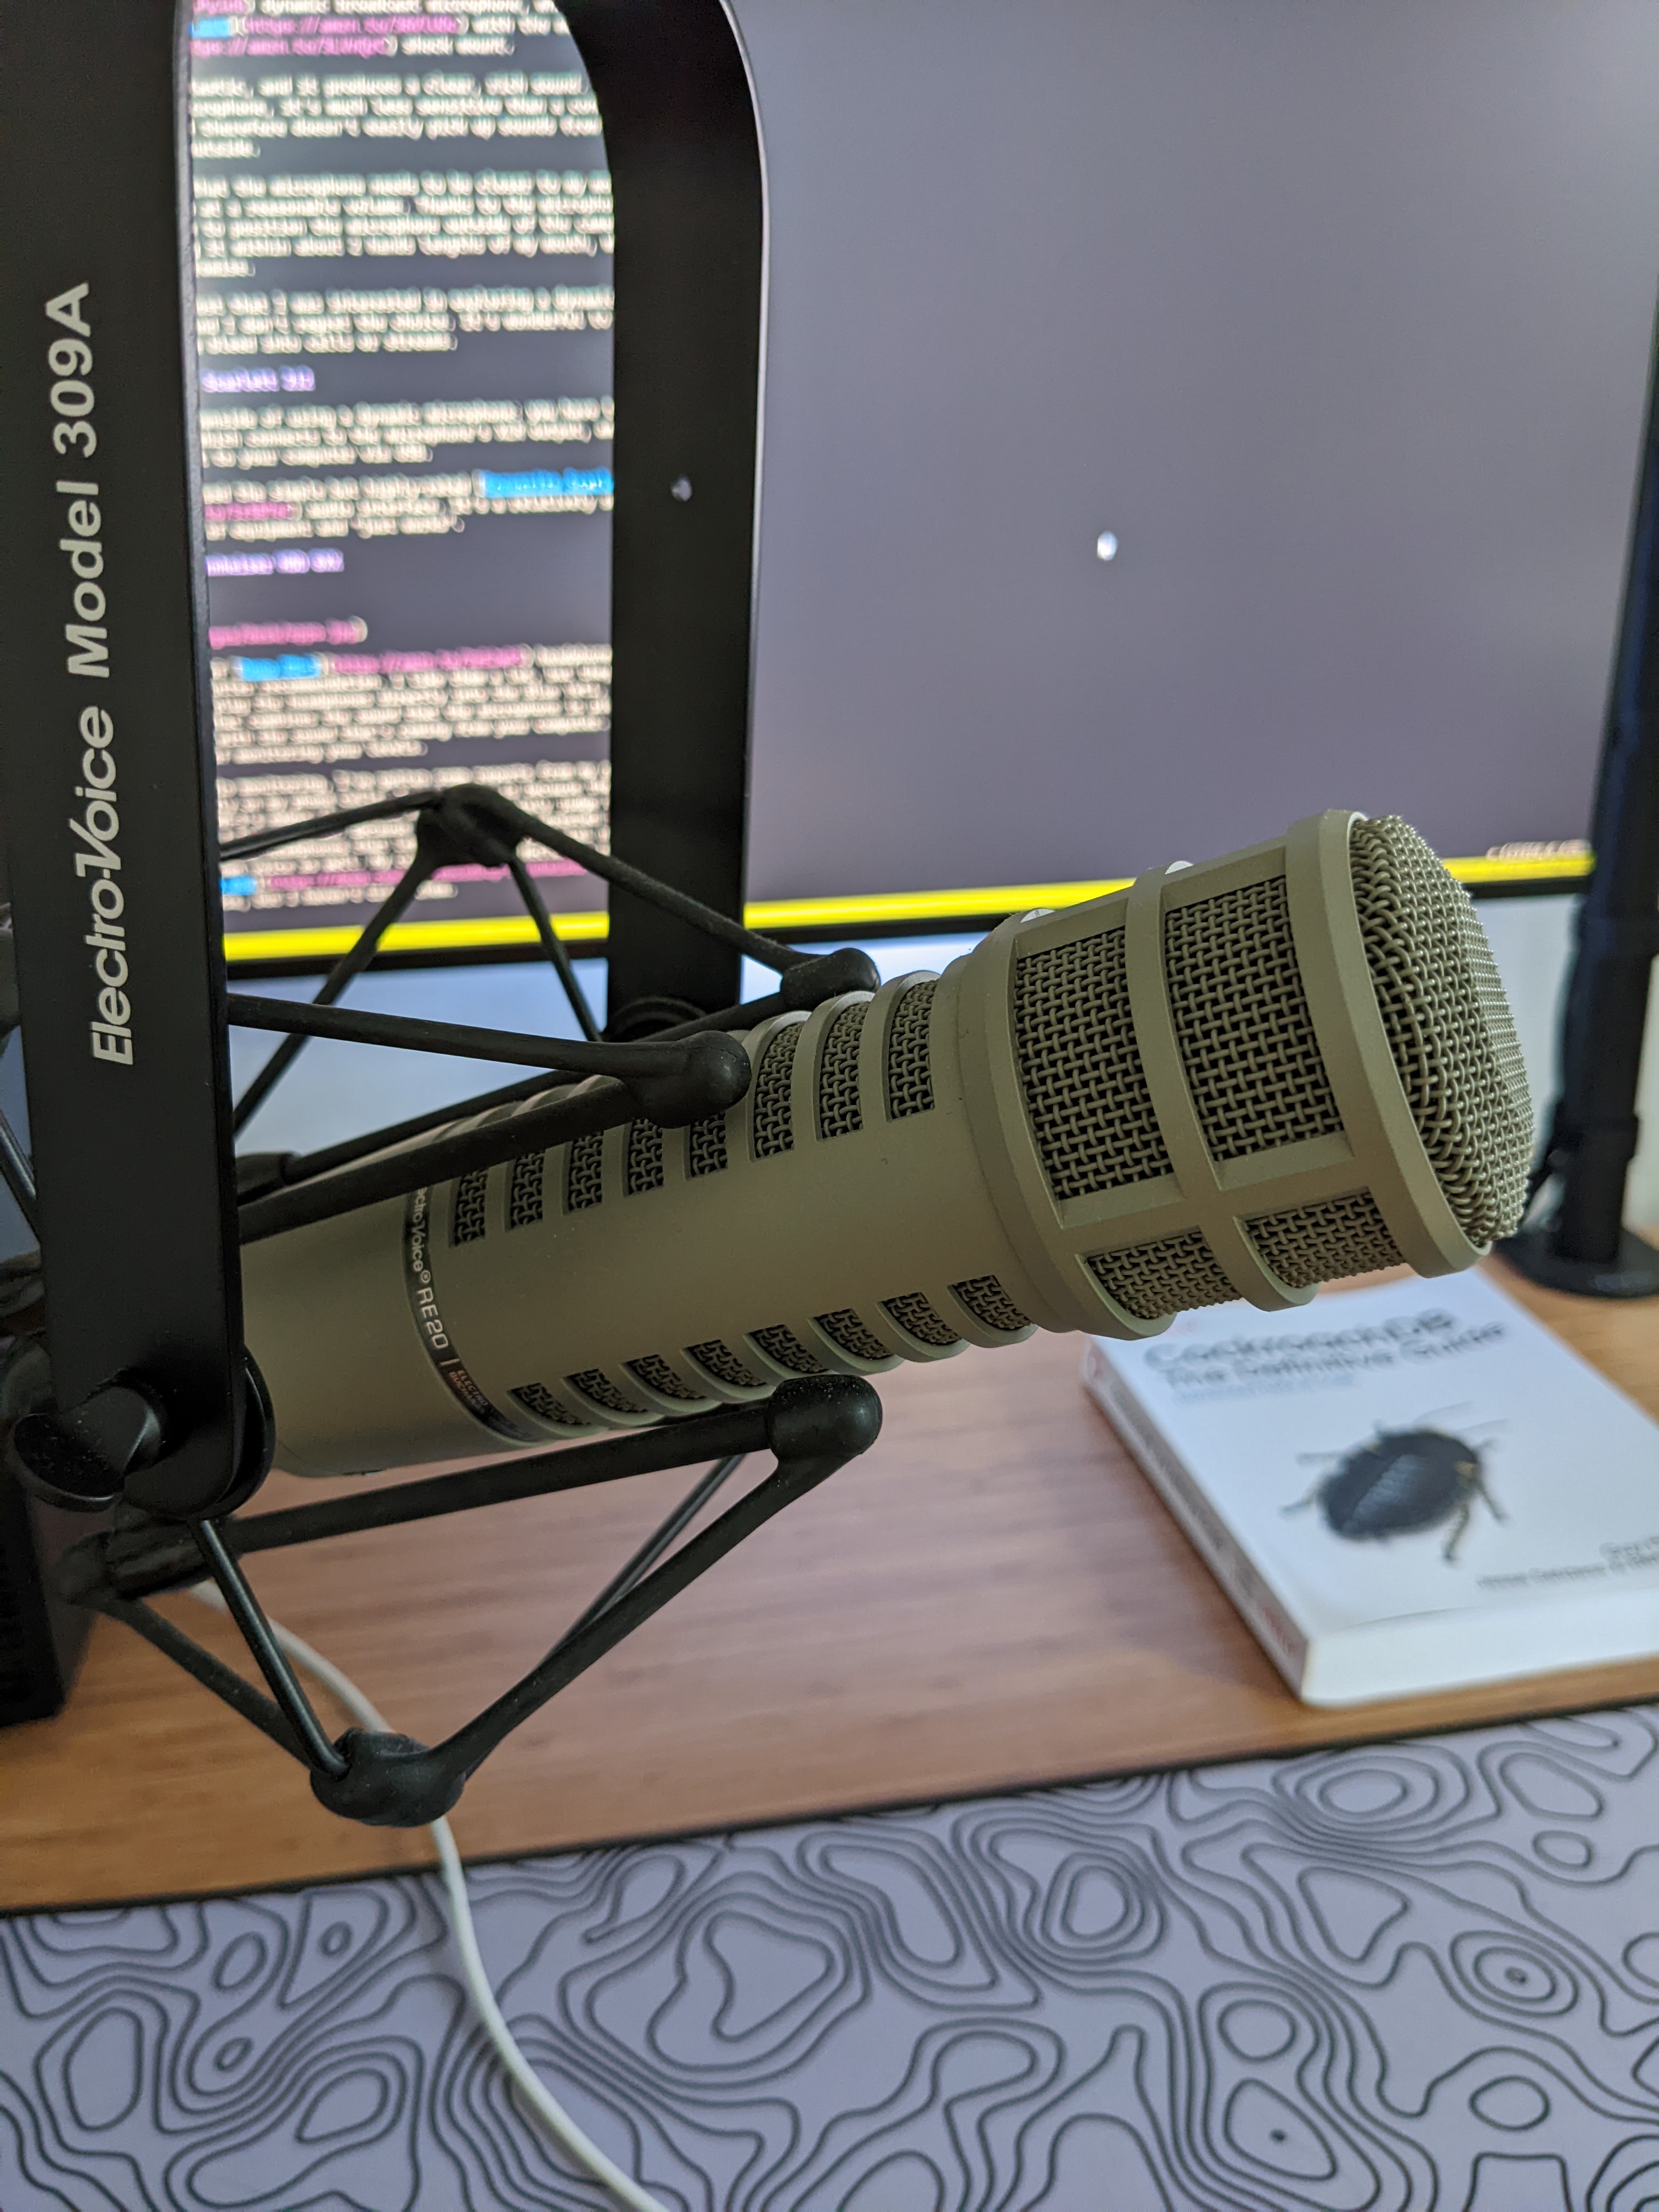
I sold my Blue Yeti condenser mic and switched to an Electro-Voice RE20 dynamic broadcast microphone, which I attached to this RØDE PSA1 boom arm with the matching Electro-Voice 309A shock mount.
This microphone is fantastic, and it produces a clear, rich sound. Due to its nature as a dynamic microphone, it’s much less sensitive than a condenser mic like the Blue Yeti and therefore doesn’t easily pick up sounds from other rooms of my house or outside.
The main downside is that the microphone needs to be closer to my mouth for my voice to be picked up at a reasonable volume. Thanks to the microphone boom arm, though, I’m able to position the microphone outside of the camera’s field of view while keeping it within about 2 hands lengths of my mouth, which provides a good compromise.
I wrote in my 2020 post that I was interested in exploring a dynamic microphone for these reasons, and I don’t regret the choice. It’s wonderful to stop worrying about noise bleed into calls or streams.
Audio Interface: Scarlett 2i2
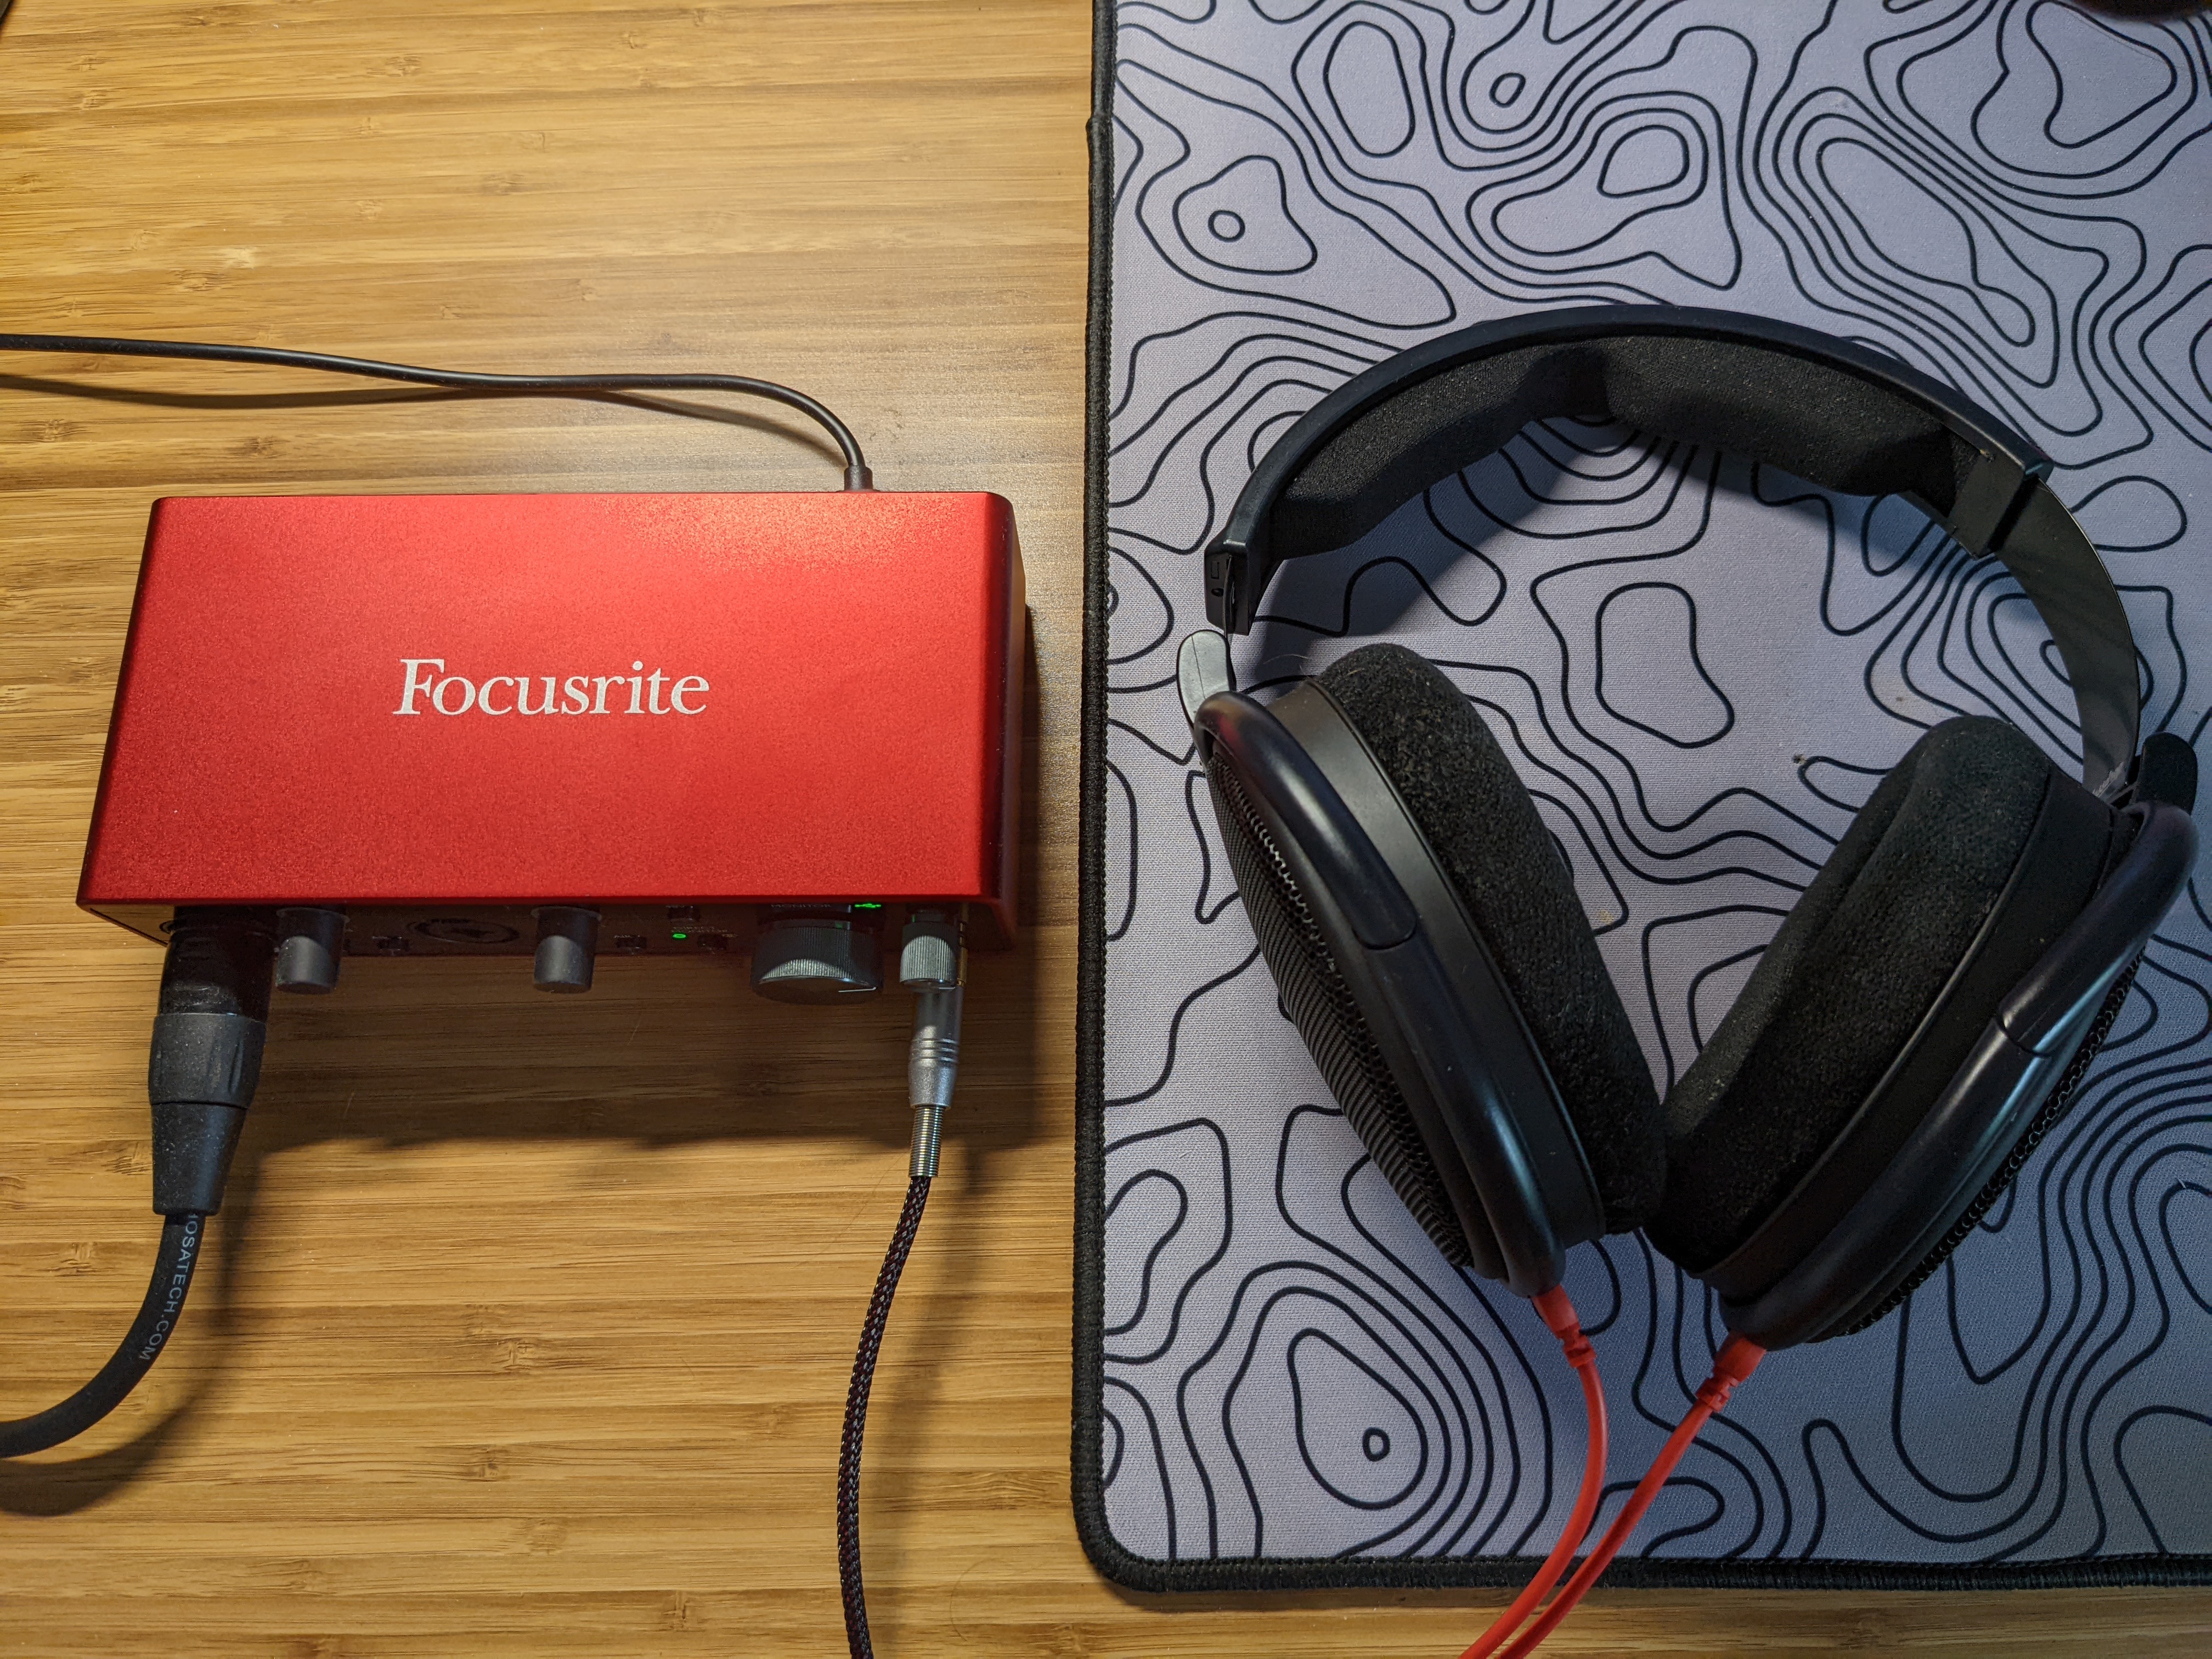
There’s one more downside of using a dynamic microphone: you have to get an “audio interface” which connects to the microphone’s XLR output, amplifies the sound, and sends it to your computer via USB.
For this, I purchased the simple but highly-rated Focusrite Scarlett 2i2 audio interface. It’s a relatively small and unobtrusive piece of equipment and “just works”.
Headphones: Sennheiser HDD 6XX
Since my 2020 post, I switched from a pair of Oppo PM-3 closed-back headphones to a pair of Sennheiser HD 6XX, which are open-back. I’m still happy with the sound of the PM-3s, but I wanted to switch to open-back headphones to help me more accurately understand the volume of my voice while on calls.
This has become more important since the pandemic, since both me and my fiancée work from home and I started to get reports of “shouting” on calls :)
The open-back headphones do make it a lot easier for me hear the volume of my voice, so I recommend open-back headphones for folks working from home. They have less sound isolation, but that also doesn’t matter as much in a home environment.
As far as sound quality, I’m very happy with this pair of headphones. They give a more “expansive” sound to music while retaining excellent clarity and crispness across the different frequency bands. I’m not audiophile enough to put any further qualifiers on the sound.
The headphones plug directly into the Scarlett 2i2, and can be used for zero-latency monitoring like plugging a pair of headphones right into a Blue Yeti, but I find that with open-back headphones it’s not nearly as important to have monitoring on.
Speakers: Bose Color Soundlink 2
I have a little Bose Color Soundlink 2 that I use for playing sound out loud. I’ve actually taken to using it for calls as well, because the RE20 doesn’t really pick up enough sound from the speaker to cause feedback.
I’d love to upgrade to a nicer speaker at some point, I think the sound from this is middling but not great. I’m interested in something like the Audioengine A2+s.
Face camera: Sony a6400
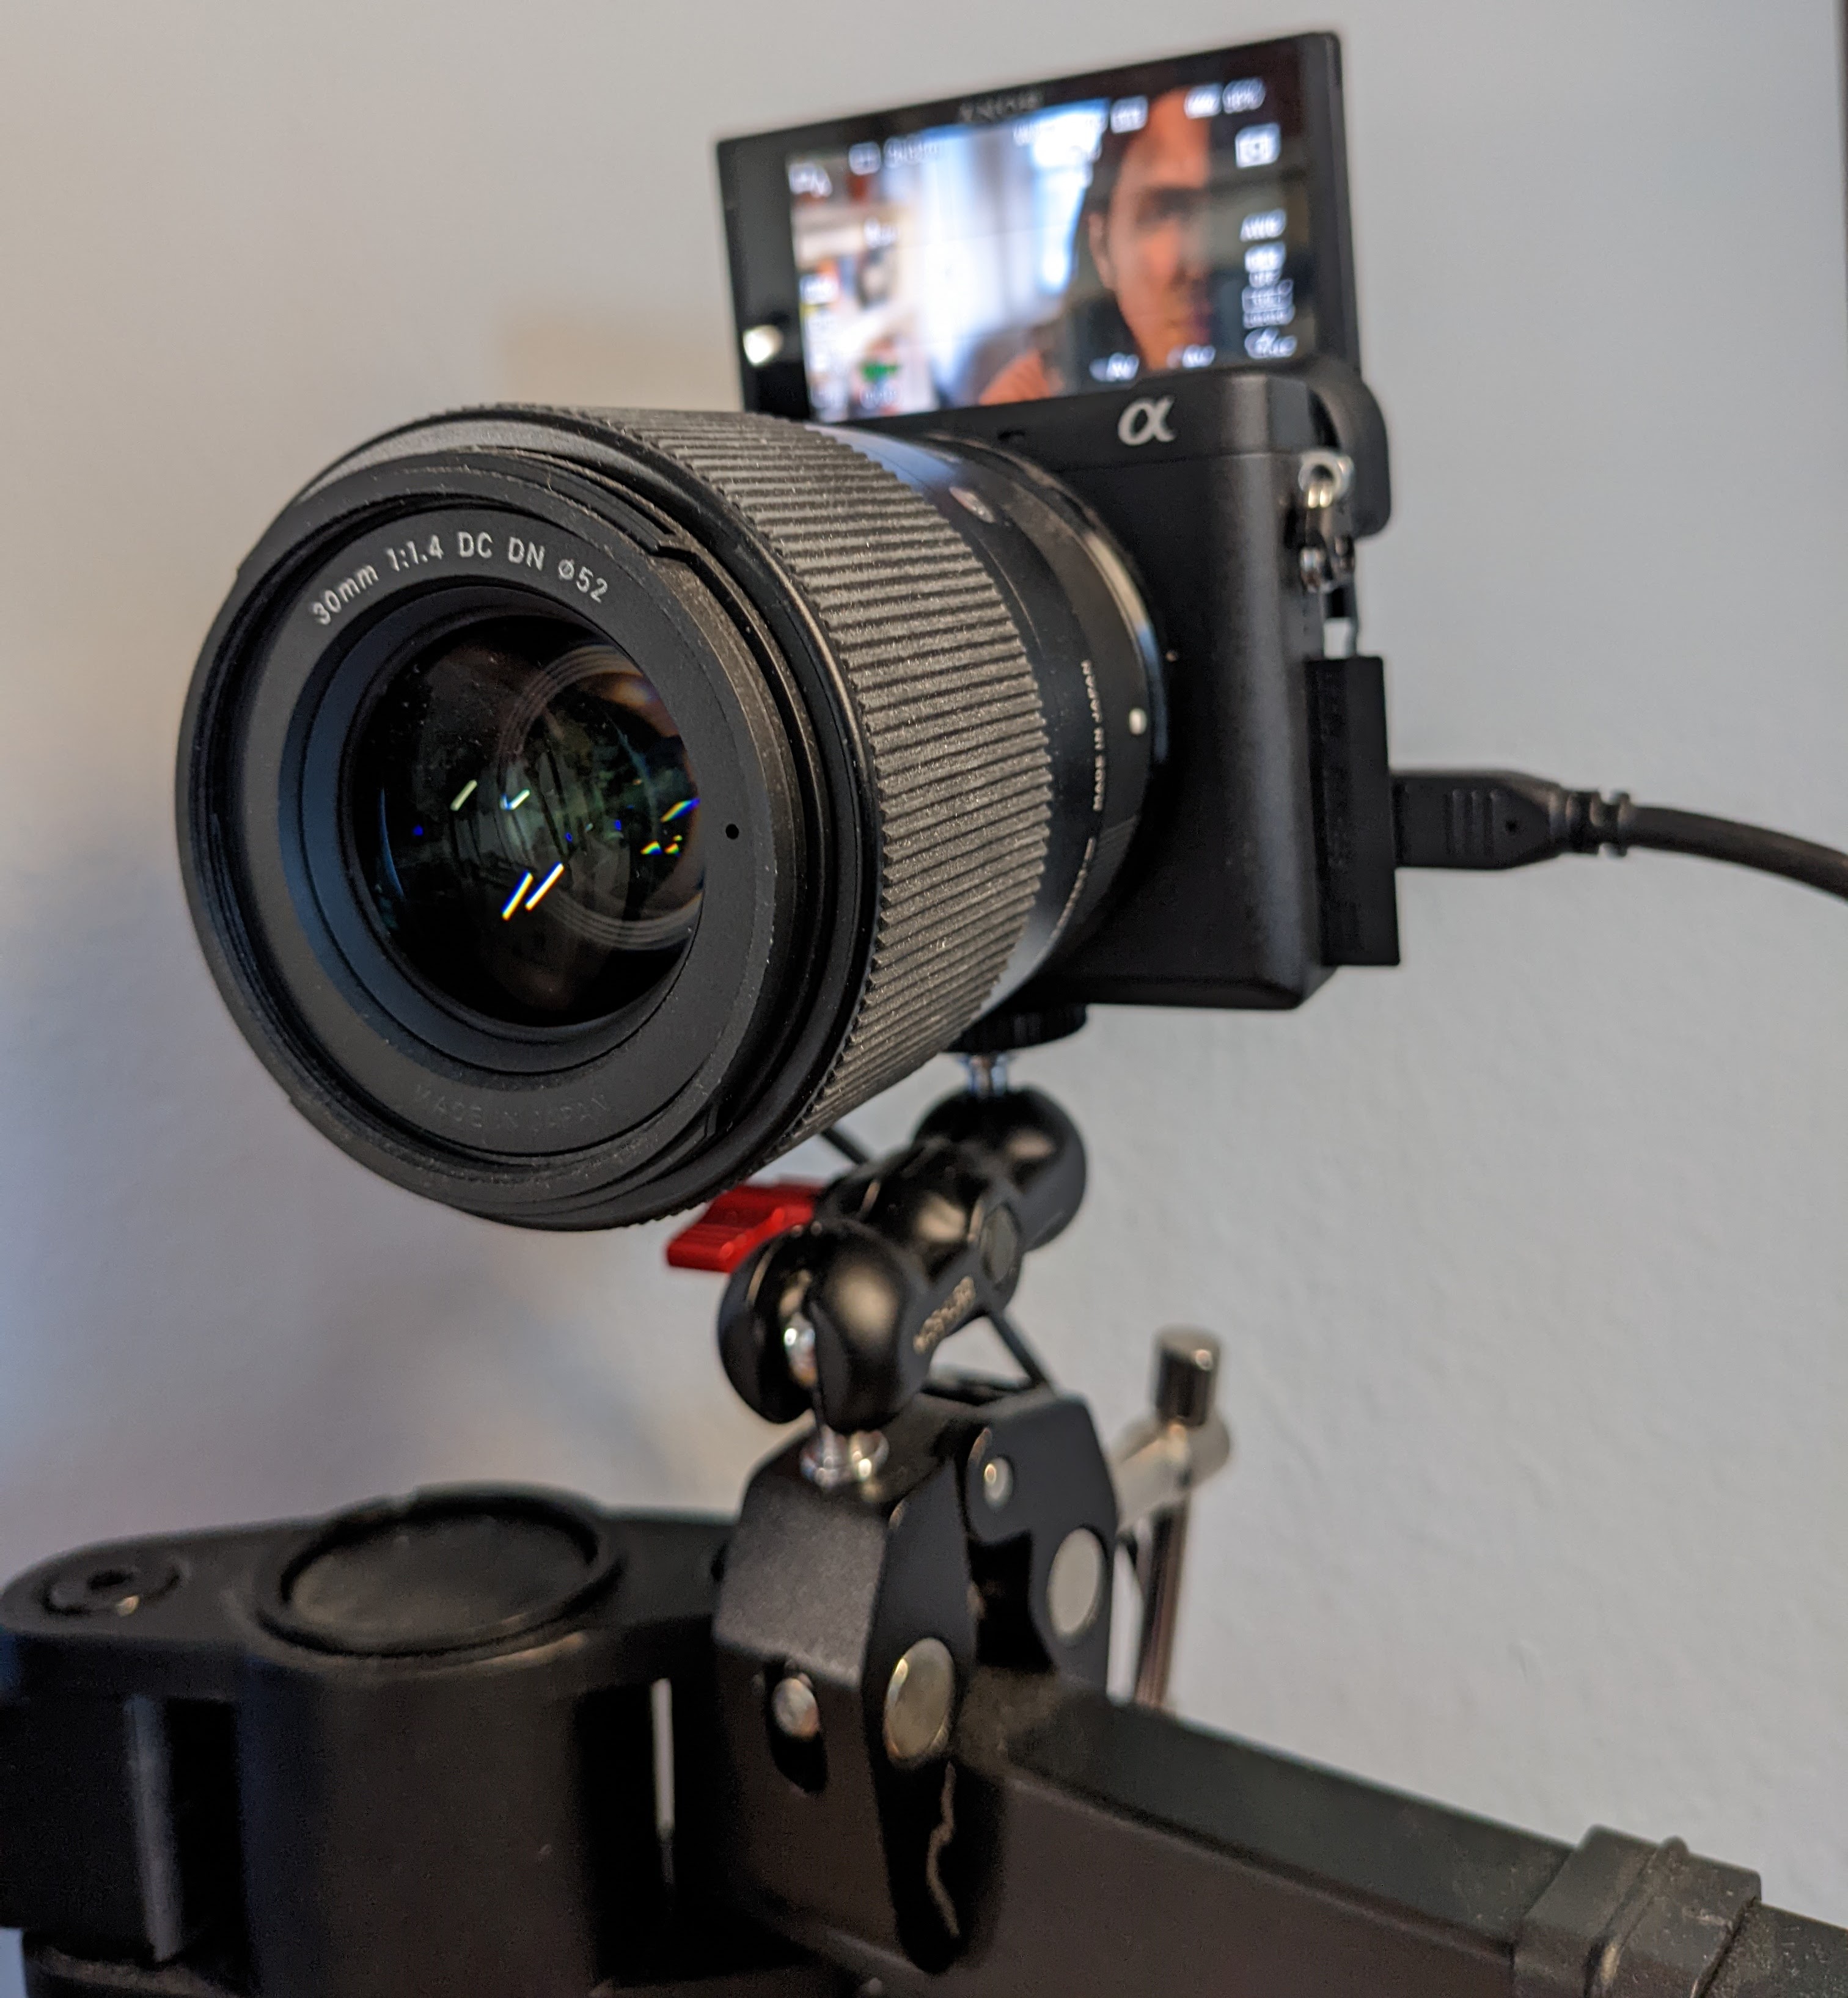
I’ve continued to use my Sony a6400 mirrorless camera with a Sigma 30mm f/1.4 lens as my webcam. It’s placed in the gap between my two monitors, which gives the closest approximation of “eye contact” that’s possible without obstructing my view or having the camera too high or too low in the same vertical plane as my main monitor.
To capture the camera’s video feed, I use an Elgato Cam Link 4k, a reliable HDMI-to-USB capture card designed for this purpose. The camera emits the video feed via a micro-HDMI to HDMI cable.
It’s also possible to connect the camera directly to a computer over USB and use Sony’s Imaging Edge Webcam software to do the video feed capture, but with this method the video feed maxes out at 30 FPS rather than 60, and there’s more of a perceptual lag in the feed. The picture quality is much better via the Elgato Cam Link.
Finally, the camera is mounted directly to the monitor stand, in between the two monitors, via a simple articulated camera mount clamp which provides a reasonable amount of flexibility and a clean mounting point.
Keyboard cam
I’ve repurposed a Logitech c920 webcam as a keyboard camera for my coding stream. I find that having my somewhat unusual keyboard on the screen is a “hook” that gets people interested in the stream. I mount the webcam on the top of my monitor, but point it downward toward my keyboard, and crop out the edges in OBS.
Lighting
A good camera can only do so much with poor lighting. To make sure my face is evenly lit on camera, I use a simple 2-point lighting setup that includes a key light and a fill light. A full 3-point setup would also include a back light to provide even more foreground-background separation, but it hasn’t seemed necessary for my setup.
I have 2 large windows in my office that let in a lot of light during the day, so I use a different combination of these lights depending on whether it’s day or night.
Key Light
The key light is the brightest light in 3-point lighting, and provides most of the light on the subject. My key light is a stand-mounted softbox LED panel light that rests on the floor behind my desk to the right.
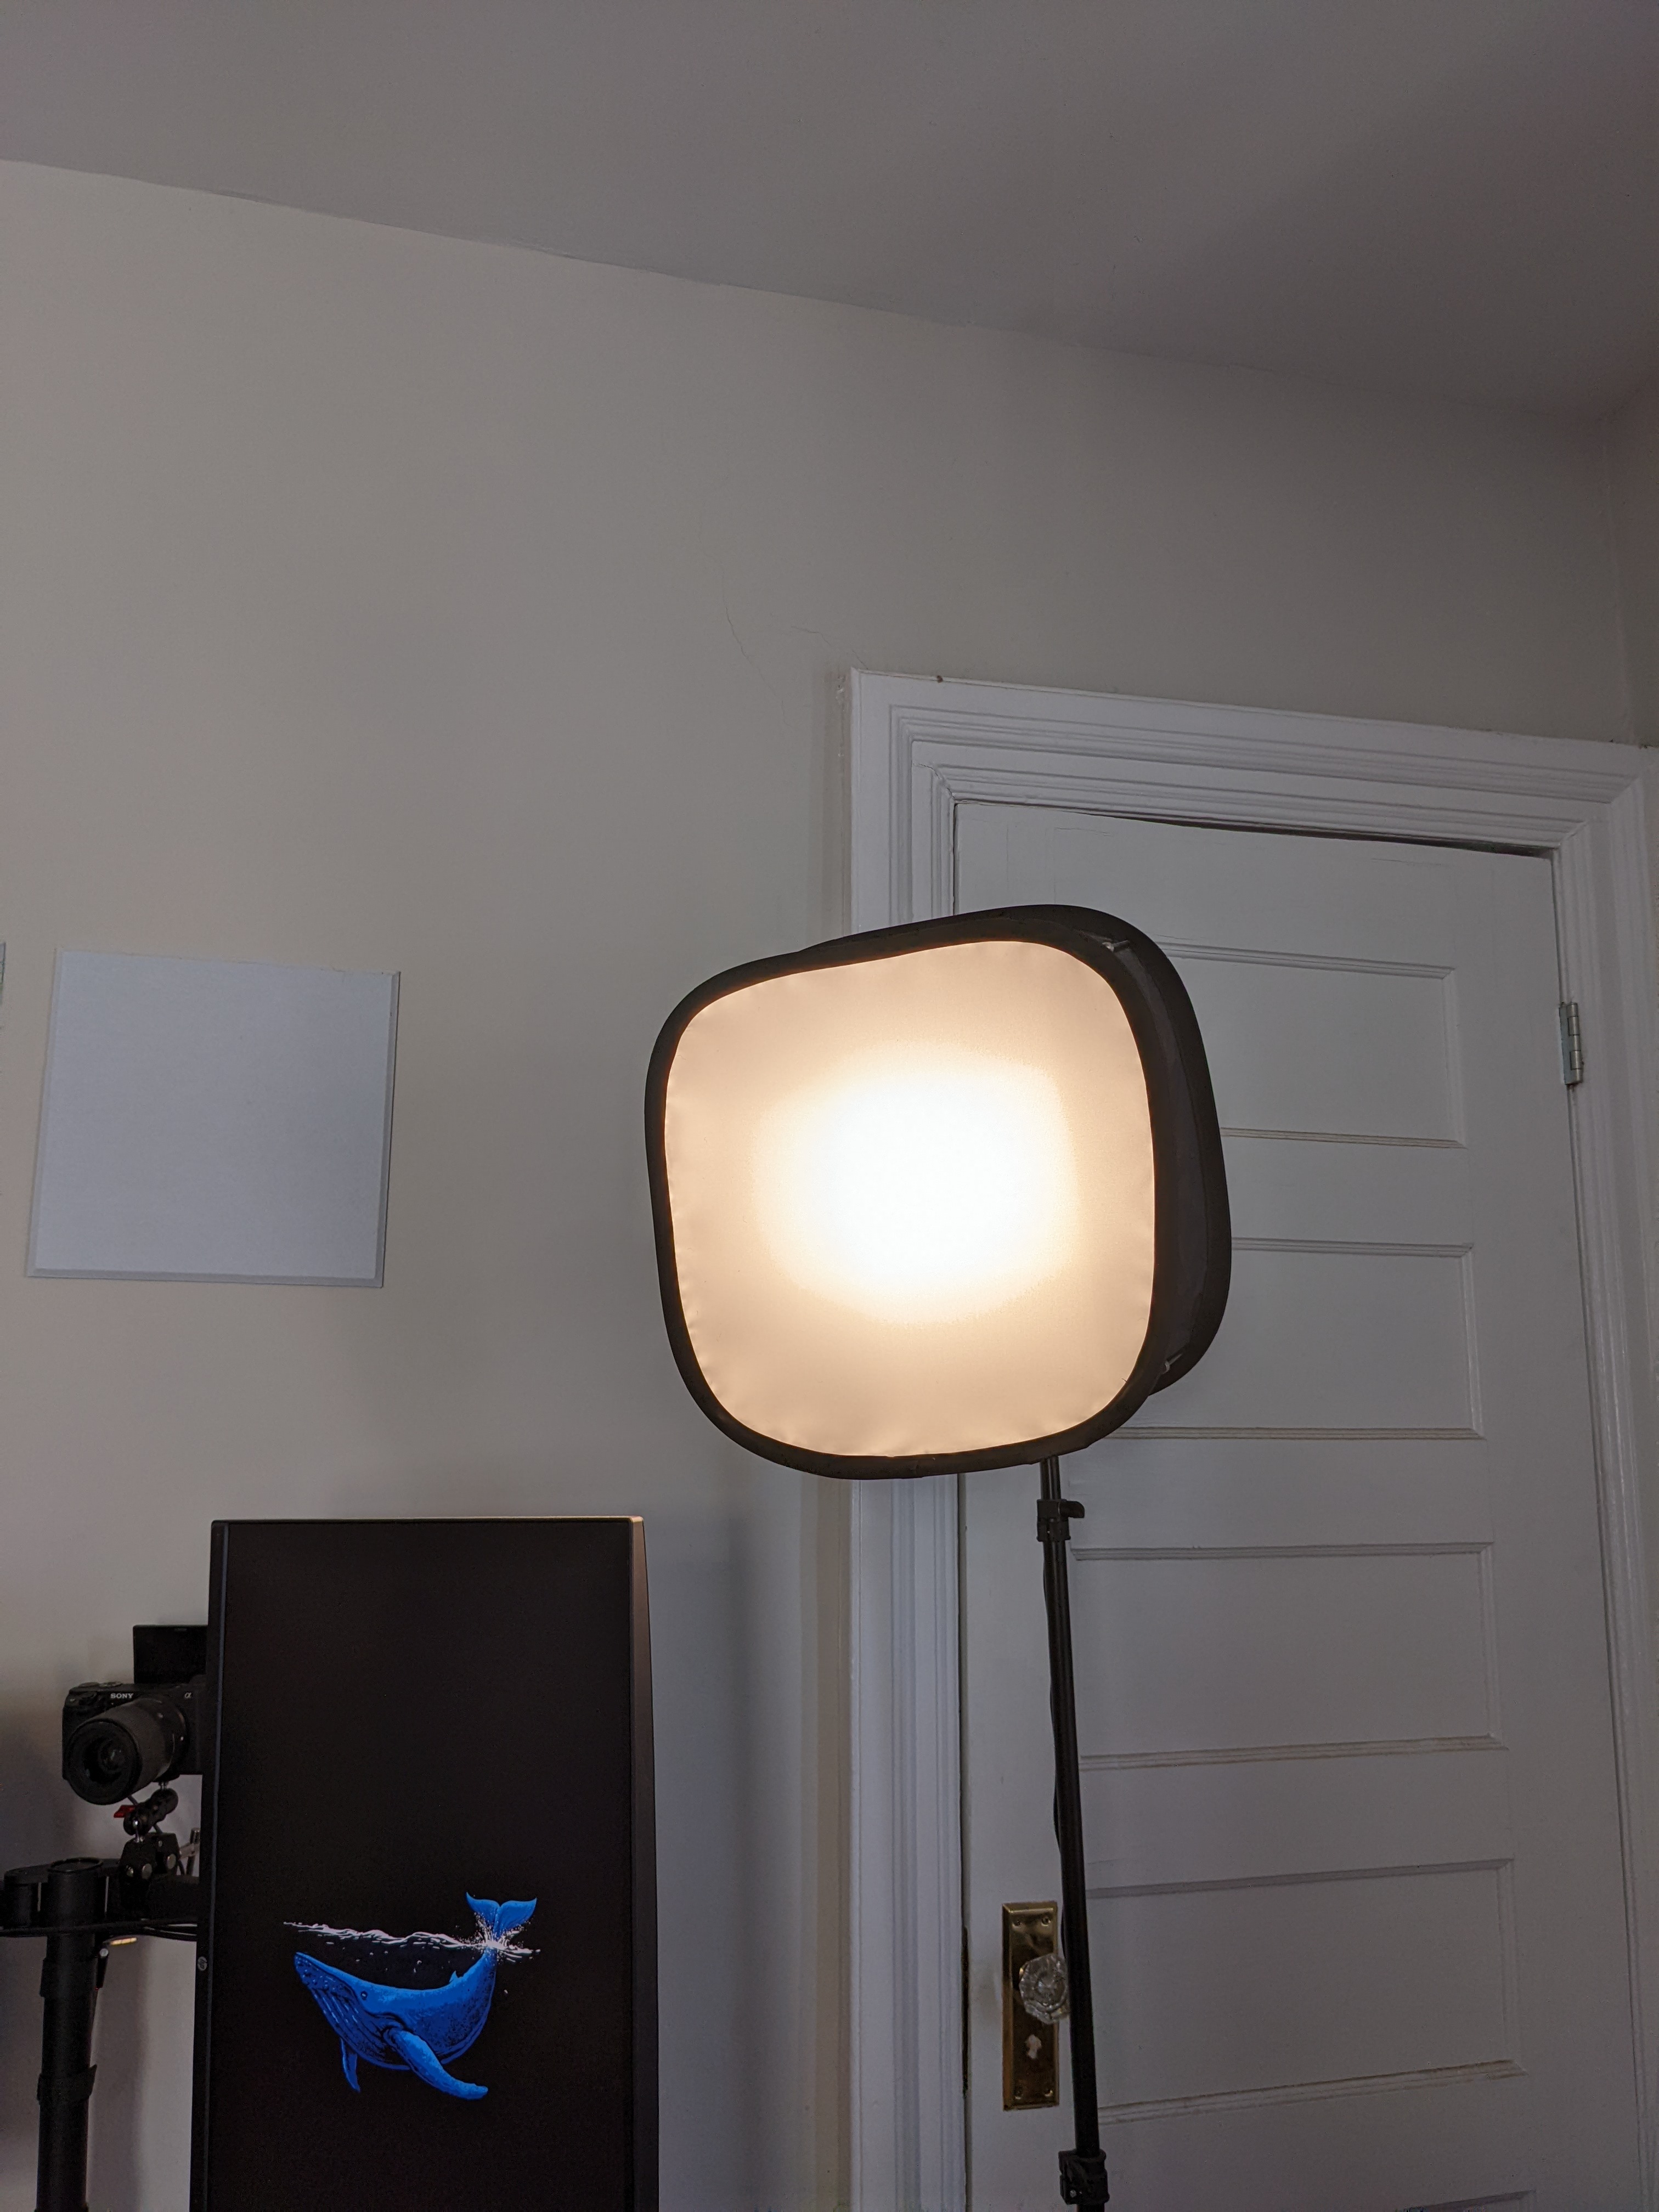
The LED panel is the Neewer Dimmable Bi-Color LED, which provides a bright, even light with an adjustable white balance. The matching Neewer softbox attachment diffuses the LED light to prevent harsh shadows. Finally, the entire light is mounted on a Neewer 75" Light Stand.
Fill Light
The fill light “fills in” the shadows cast on the subject by the key light. It prevents a harsh contrast between the subject’s lit and unlit sides, which is easily visible if a room is dark and the subject is lit only by the key light. This light isn’t necessary for me during the day, because of the ample reflected light let in by the windows in my office, but it makes a big improvement to image quality at night.
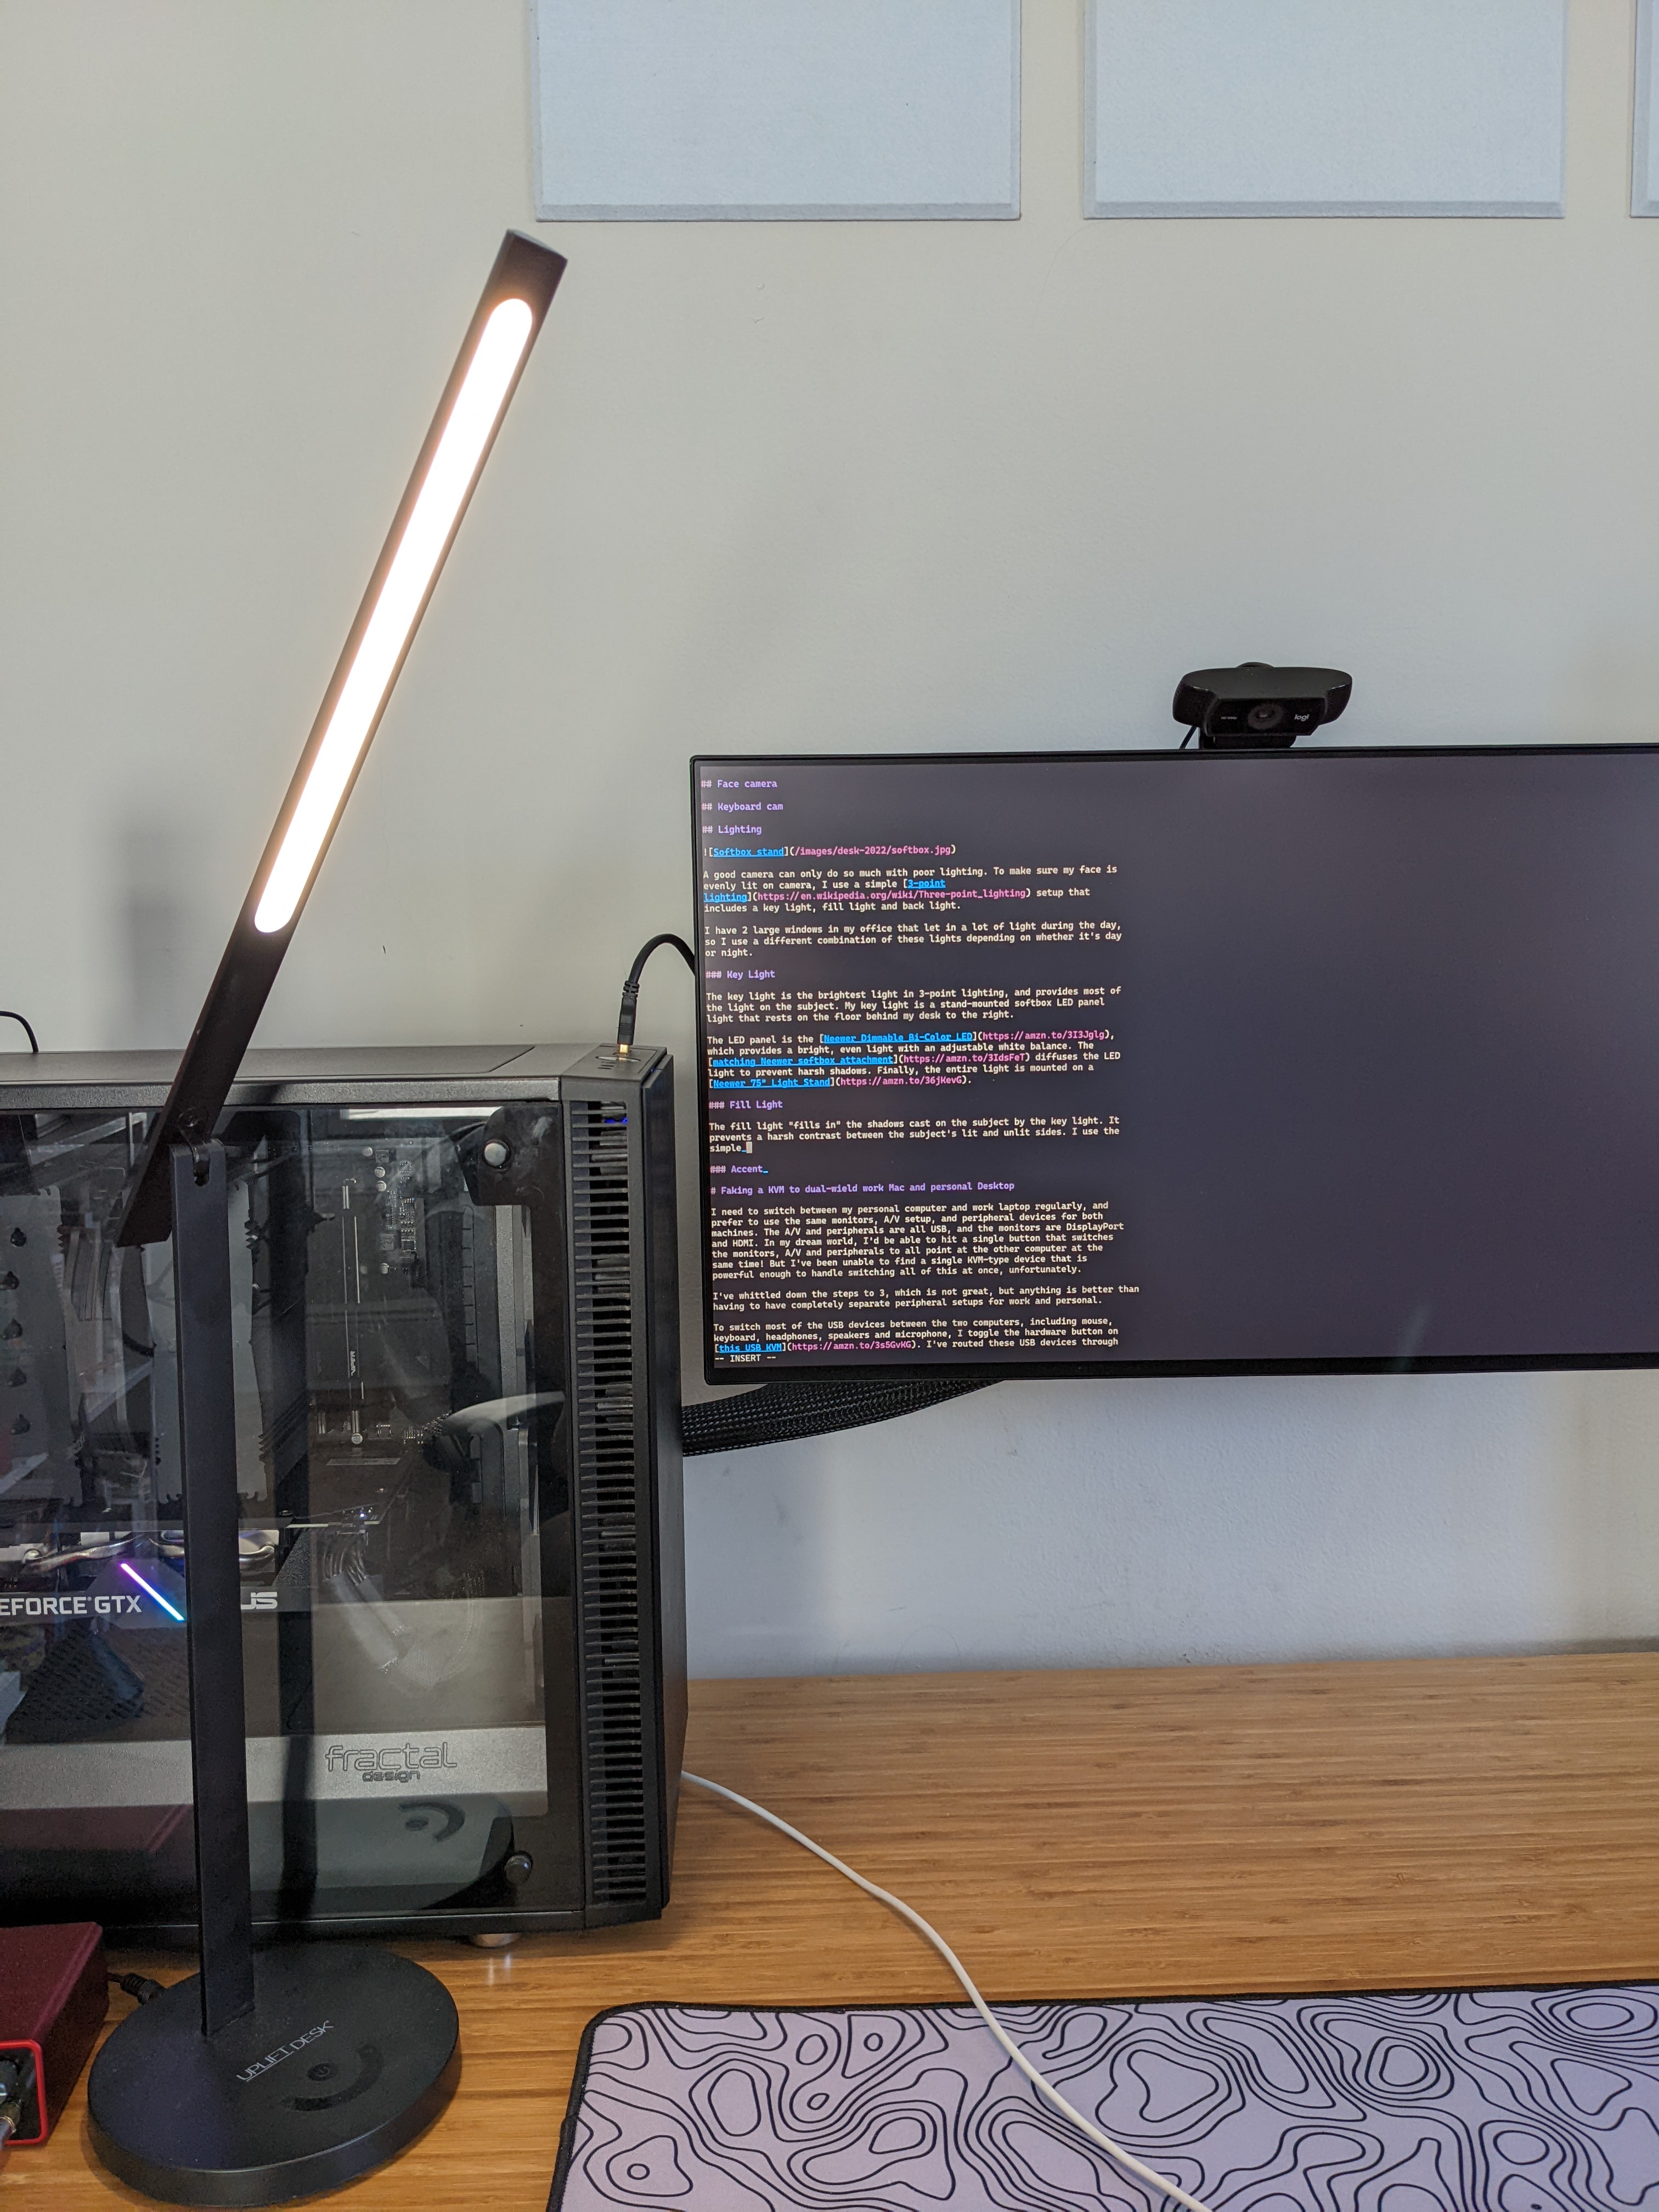
I use the UPLIFT E3 LED Desk Lamp that came as a freebie with my desk for my fill light. It has an adjustable brightness and does the trick just fine, though I’m not completely happy that it takes up space on my desk in front of my PC.
Background Lights
I have a bookshelf and couch in my office that sit in the background of my camera’s vantage point. To prevent the background of my stream from looking dark and boring at night, I carefully lined the underside of the shelves and back of the couch with colorful, programmable LED strip lights.
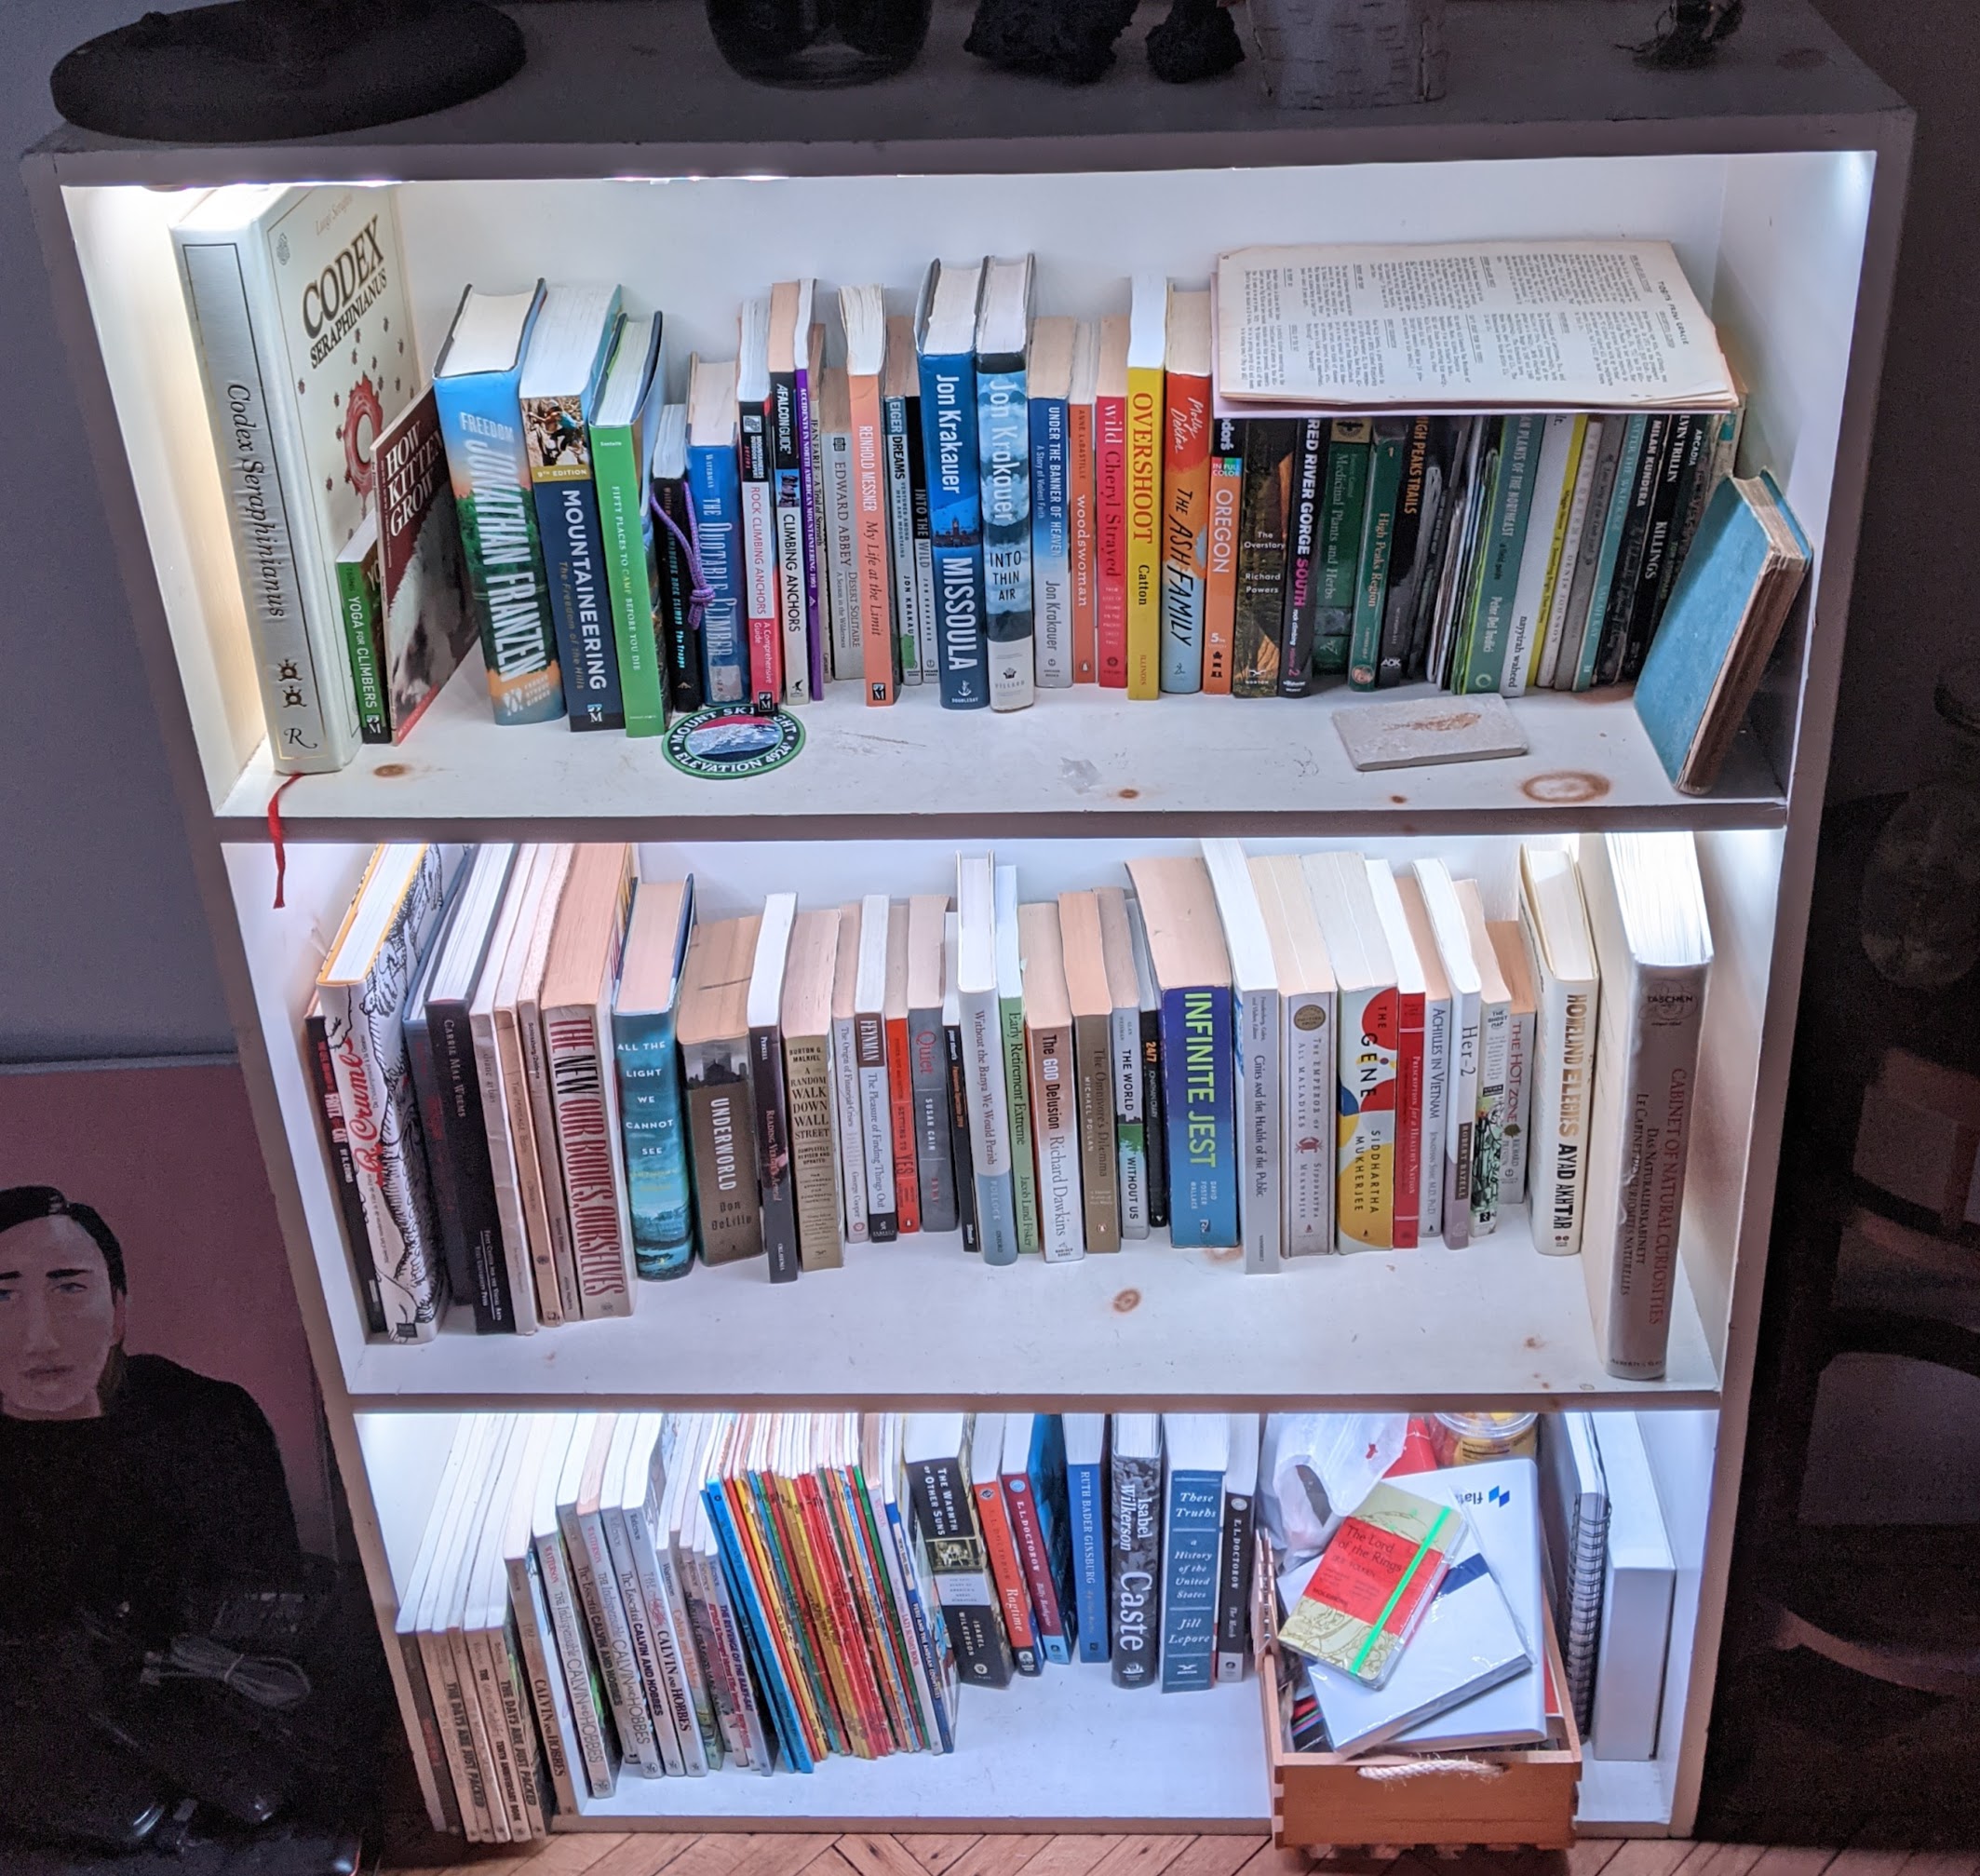
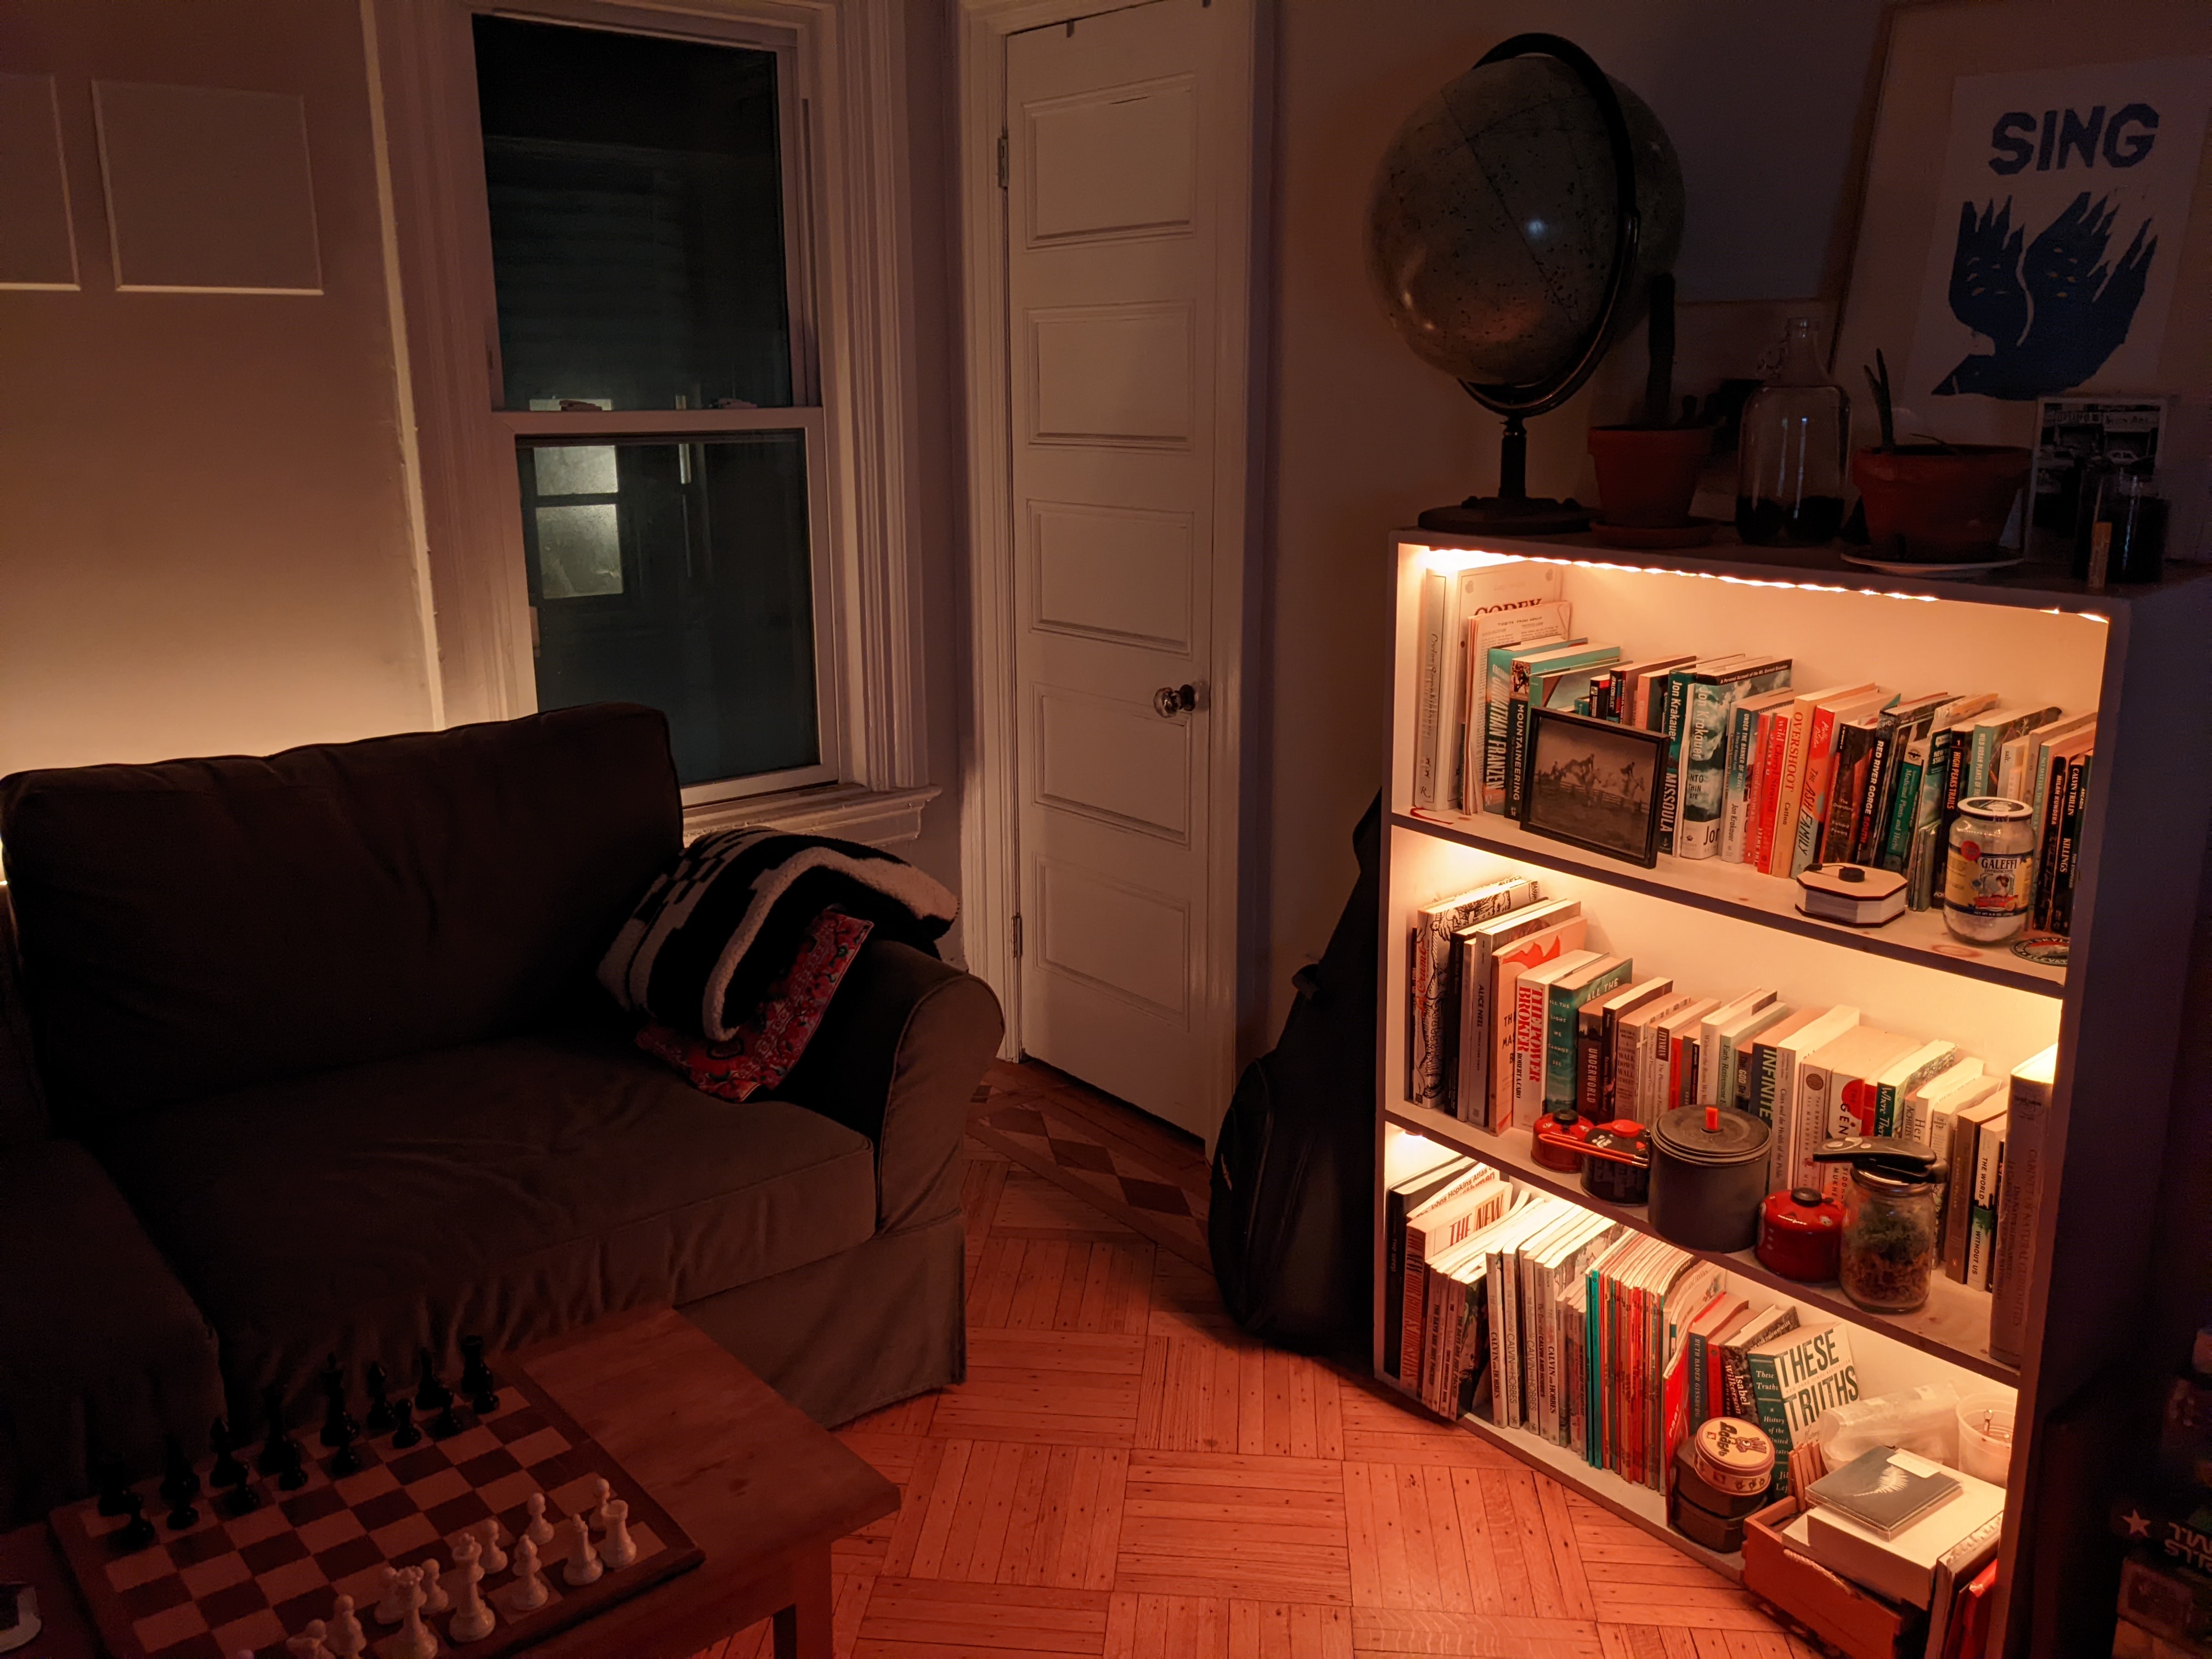
I used a Govee RGBIC LED Strip Light kit to accomplish this effect. Rather than use the adhesive on the bottom of the strips, which wasn’t particularly effective, I used these adhesive clips.
I tried to avoid making an overly gamer-y vibe for the room, and I’m not totally sure I succeeded, but the fact that the strips are out of view when they’re off makes a big difference (and did the trick of convincing my fiancée that this project was a good idea). The colors are customizable from the Govee app and there are many nice presets. I usually use either a bright white-blue or a gently changing warm orange-yellow that somewhat resembles a flickering fireplace.
Faking a KVM to dual-wield work Mac and personal Desktop
I need to switch between my personal computer and work laptop regularly, and prefer to use the same monitors, A/V setup, and peripheral devices for both machines. The A/V and peripherals are all USB, and the monitors are DisplayPort and HDMI. In my dream world, I’d be able to hit a single button that switches the monitors, A/V and peripherals to all point at the other computer at the same time! But I’ve been unable to find a single KVM-type device that is powerful enough to handle switching all of this at once, unfortunately.
I’ve whittled down the steps to 3, which is not great, but anything is better than having to have completely separate peripheral setups for work and personal.
To switch most of the USB devices between the two computers, including mouse, keyboard, headphones, speakers and microphone, I toggle the hardware button on this USB KVM. I’ve routed these USB devices through a separate, powered USB hub to the KVM, so toggling the button instantly switches the computer that they are all connected to.
Unfortunately, this technique doesn’t work for the Elgato Camlink that I use to capture the video output from my camera. I think it’s because the Camlink uses too much USB bandwidth, but I’m not entirely sure. Whatever the cause, the Camlink is unreliable when routed through the USB KVM, so I have to swap it between the computers manually.
The last step is to switch which computers the monitors are driven by. I haven’t found a device that allows switching 2 HDMI or DisplayPort connections at once to allow a hardware button switcher similar to the USB KVM, so I went with the low-tech solution of simply using two cables in each monitor. The Mac laptop drives both monitors with two separate HDMI-to-USBC cables, using the CableCreation USB-C HDMI Hub for one, and a simple HDMI to USB-C cable for another. The PC drives the 4K LG with a DisplayPort cable (which is necessary to get the maxmimum refresh rate out of that monitor), and the HP with another HDMI cable.
When only one machine is on, the monitors automatically sense which input to use, and everything just works without user intervention. Switching between the computers when both are on requires changing the input source on both monitors, a major annoyance.
These two setups are frankly a pain in the butt to switch between, but I haven’t figured out a better way as of yet. Let me know on Twitter if you have ideas for improvement.
Game consoles and capture card
I enjoy playing console games and own an Analogue Super NT, PS4, and Nintendo Switch. I don’t own a television and entertain fantasies of occasionally streaming games on Twitch, so I have the consoles routed through a capture card and displaying on my main computer monitor.
To accomplish this, all of the HDMI outputs for the 3 consoles route through this inexpensive HDMI switcher into an AVerMedia Live Gamer Portable 2 Plus. I’m not particularly happy with this capture card, as it’s large, ugly, and has some perceptual input lag on the captured feed, but it does the trick.